How to Create and Set up an Apple ID on Apple Devices
As the foundational account, the Apple ID powers all of Apple's digital products, services, and subscriptions. It is a digital identity that allows access to every Apple service across multiple digital devices, including iPhone, iPad, Mac, Apple Watch, and more. Moreover, it helps you sync data through iCloud, such as Contacts, Calendars, Bookmarks, Reminders, etc. This guide tells you how to create a new Apple ID on an iPhone, iPad, Mac, or online.
PAGE CONTENT:
Part 1: How to Create an Apple ID
When you set up a new iPhone or iPad, you are asked to create an Apple ID. Moreover, you can create one account on a used iOS device, Mac, and online. Plus, you can even create an account for your child.
How to Create an Apple ID on a New iPhone
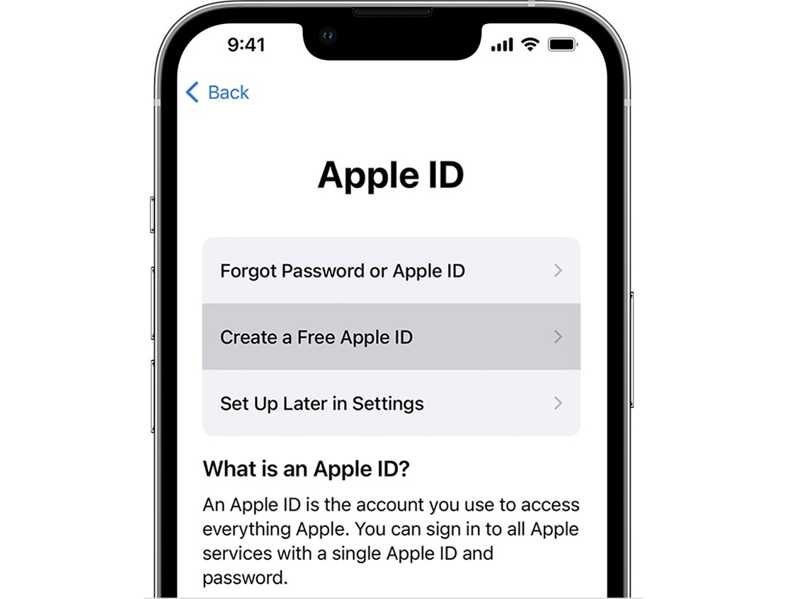
Step 1. Power on your new iPhone or iPad and set it up.
Step 2. Choose Create a Free Apple ID on the Apple ID screen.
Step 3. Set your birthday, enter your name, and tap Continue.
Step 4. Type the email address that is used for your Apple ID account.
Tips: If you don't have an email address, tap Don't have an email address and create a free iCloud email address.
Step 5. Verify your email address and create a strong password.
Step 6. Set your country and set up two-factor authentication.
How to Create a New Apple ID on a Used iPhone via Settings
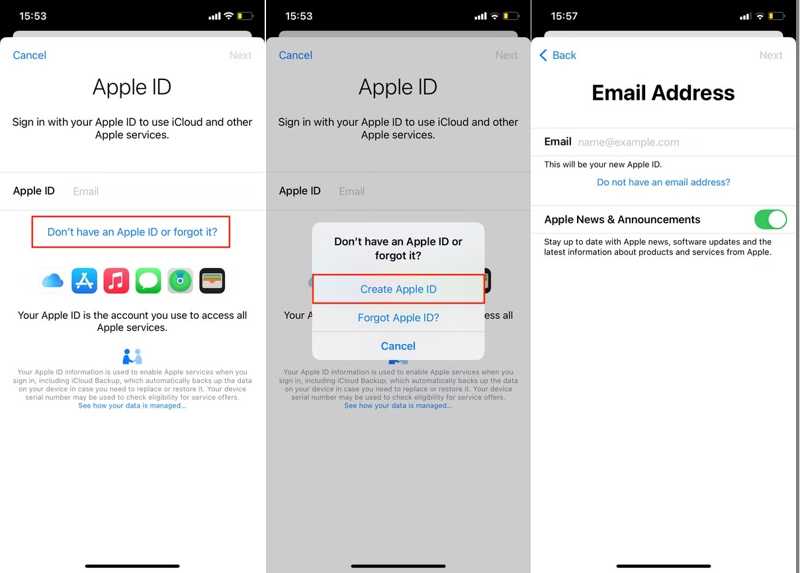
Step 1. Open the Settings app on your device.
Step 2. Tap Sign in to your iPhone at the top of your screen.
Step 3. Press Don't have an Apple ID or forgot it and choose Create Apple ID.
Step 4. Offer your name and birthday, and tap Next.
Step 5. Enter your email address, which will be your new Apple ID.
Step 6. Next, leave a strong password for your account.
Step 7. Confirm your phone number and tap Continue.
Step 8. Read the Terms and Conditions and tap Agree.
Step 9. Finally, access your email, open the Verify your Apple ID email, and tap Verify Now.
How to Create a New Apple ID on a Used iPhone via App Store
Step 1. Run the App Store and tap the My Account button to sign up a new Apple ID.
Step 2. Press Create New Apple Account.
Tips: If you cannot find it, sign out your iCloud.
Step 3. Follow the onscreen prompts to fill out the form.
Step 4. Provide your email address and type a password.
Step 5. Fill out other information, including your payment method and billing information.
Step 6. Confirm your phone number to verify your identity when recovering your account.
Step 7. Tap Next and verify your email address.
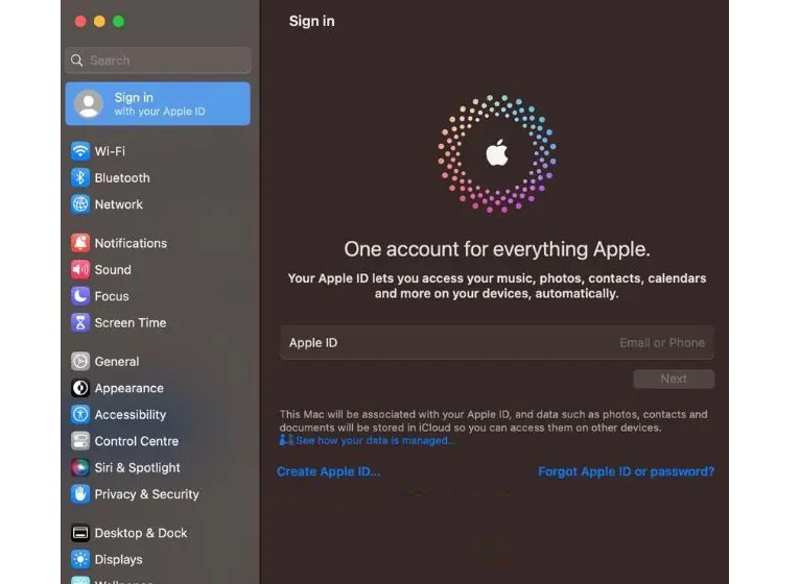
How to Make a New Apple ID on Mac

Step 1. Choose System Settings or System Preferences from your Apple menu.
Step 2. Click the Sign in button.
Step 3. Click Don't Have an Account or Create an Apple ID to make a new Apple ID on your Mac.
Step 4. Fill out your personal information.
Step 5. Provide your email address to use as your Apple account.
Step 6. Make a password and set your region.
Step 7. Provide other information and click Continue.
Step 8. Confirm your phone number and click Next.
Step 9. Finally, verify your email.
How to Get a New Apple ID on Windows
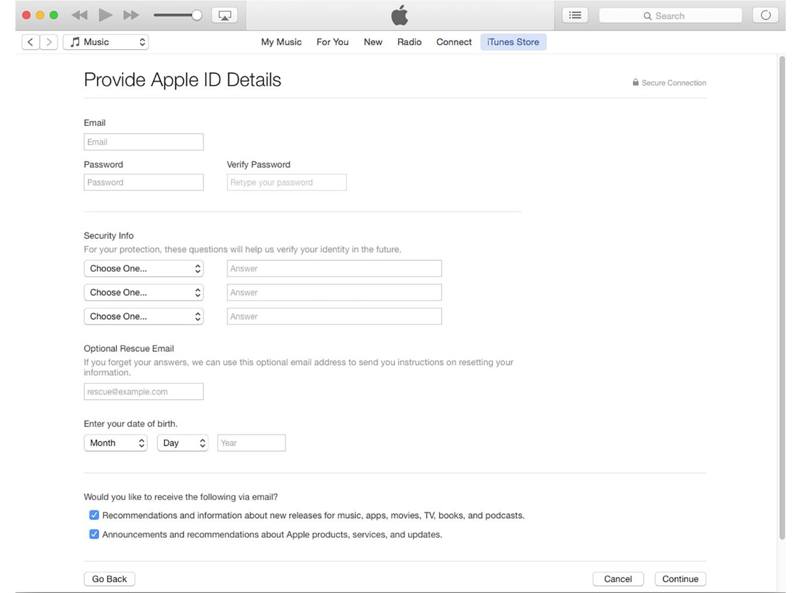
Step 1. Open the latest version of iTunes to get a new Apple ID on your PC.
Step 2. Go to the Account menu and choose Sign In.
Step 3. Click Create New Apple Account on the pop-up dialog.
Step 4. Enter the necessary information, like your email address, password, and more.
Step 5. Click Continue and provide your payment information.
Step 6. Click Create Apple Account to finish the process.
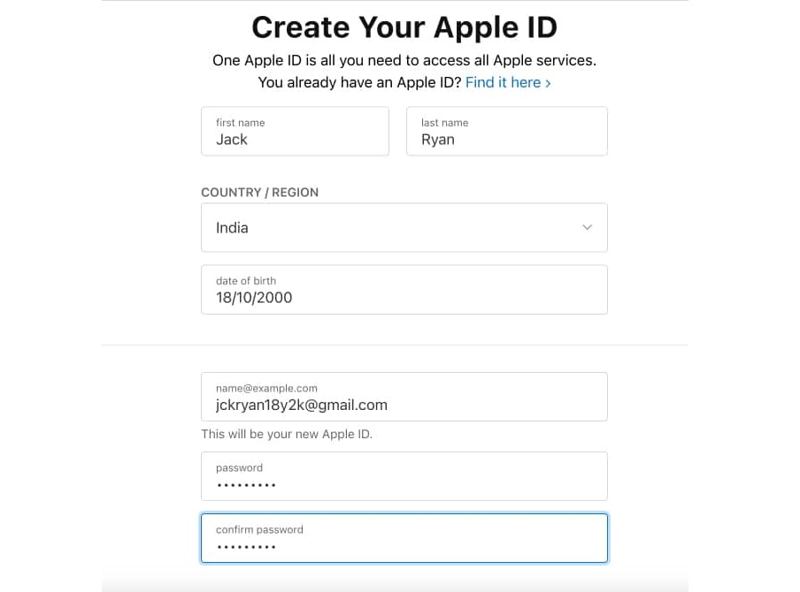
How to Create a New Apple ID Account Online
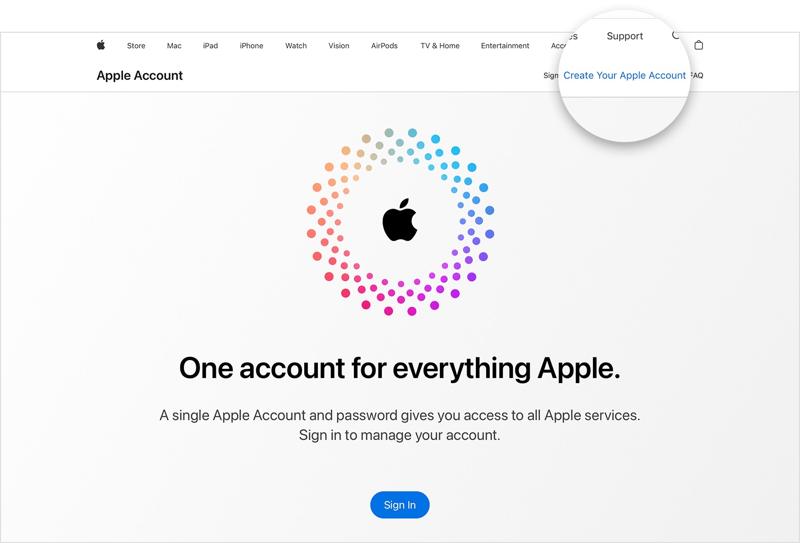
Step 1. Visit account.apple.com to create a new Apple ID account online.
Step 2. Click Create Your Apple Account at the top right corner.
Step 3. Provide your email address for your Apple ID and create a password.
Step 4. Offer other personal information and click Continue.
Step 5. Open the email address and verify it from the mail sent by Apple.
How to Create an Apple ID Login for Your Child
Instead of sharing your account with your kid, you can create an Apple ID login for his or her on your iPhone or Mac. In this way, you can set parental controls and use Family Sharing and other features.
On an iPhone/iPad
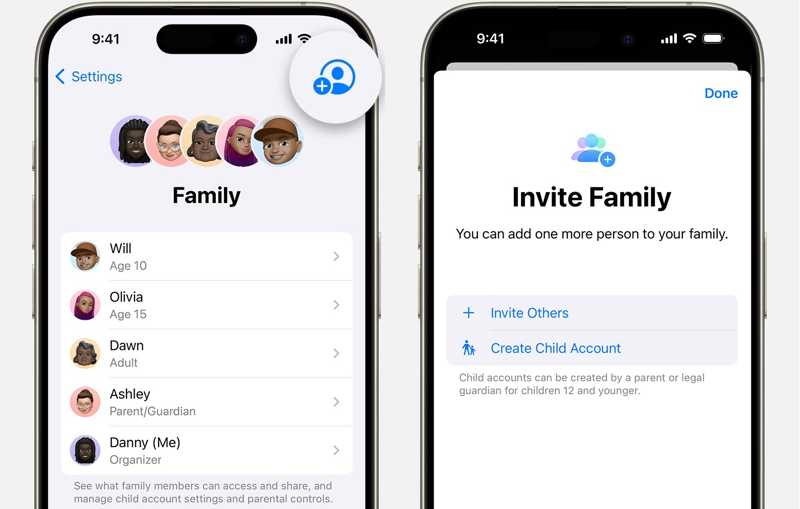
Step 1. Run your Settings app.
Step 2. Go to the Family tab and tap the Add Member button at the top right side.
Step 3. Tap the Create Child Account button and hit Continue.
Step 4. Enter your child's name and birthday, and then finish the Apple ID setup.
Note: On iOS 15 or iPadOS 15 and earlier, tap on your name in your Settings app, tap Family Sharing, hit Add Member, press Create an Account for a Child, and tap Continue. Follow the onscreen instructions to finish setting up.
On a Mac
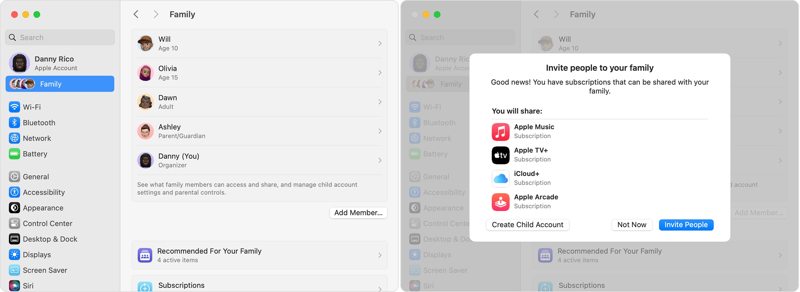
Step 1. Go to your Apple menu, choose System Settings, and click Family.
Tips: On macOS Monterey or earlier, choose System Preferences in the Apple menu, click Family Sharing, and hit Add.
Step 2. Click Add Member and click Create Child Account on the dialog.
Step 3. Follow the onscreen instructions to set up an Apple ID account for your child.
Part 2: How to Set up a New Apple ID
If you have already generated an Apple ID account, you can set it up on your iPhone, iPad, or Mac. Then, you can activate your device and use all built-in Apple services, such as download apps from the App Store.
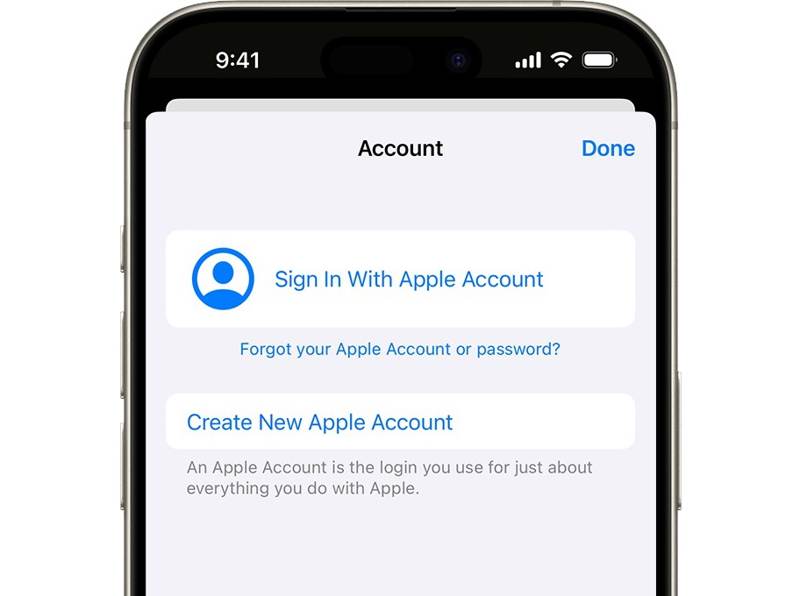
How to Set up a New Apple ID on an iPhone/iPad
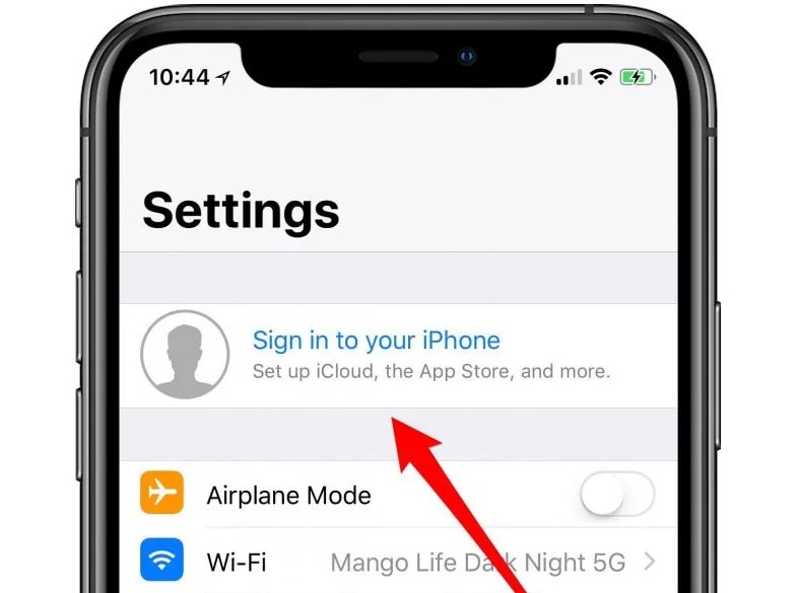
Step 1. Run the Settings app.
Step 2. Tap Apple Account or Sign in to your iPhone.
Step 3. Choose one of the following:
Use another Apple device: Place another iOS device where you have set up your Apple ID and follow the onscreen instructions to complete the process.
Sign in manually: Enter your email address or phone number and your password.
Note: If you have set up two-factor authentication, enter the six-digit verification code.
How to Set up a New Apple ID on a Mac
Step 1. Choose System Settings or System Preferences in your Apple menu.
Step 2. Click the Sign in button on the sidebar.
Step 3. Enter your Apple ID email or phone number and click Next.
Step 4. Type your Apple ID password and follow the prompts to complete setting up your Apple ID on your Mac.
Part 3: What to Do If You Cannot Create an Apple ID
If you cannot create an Apple ID on your iPhone or Mac, there are some things you can try. We have identified and explained the verified solutions below so that you can make a new Apple ID on your device.
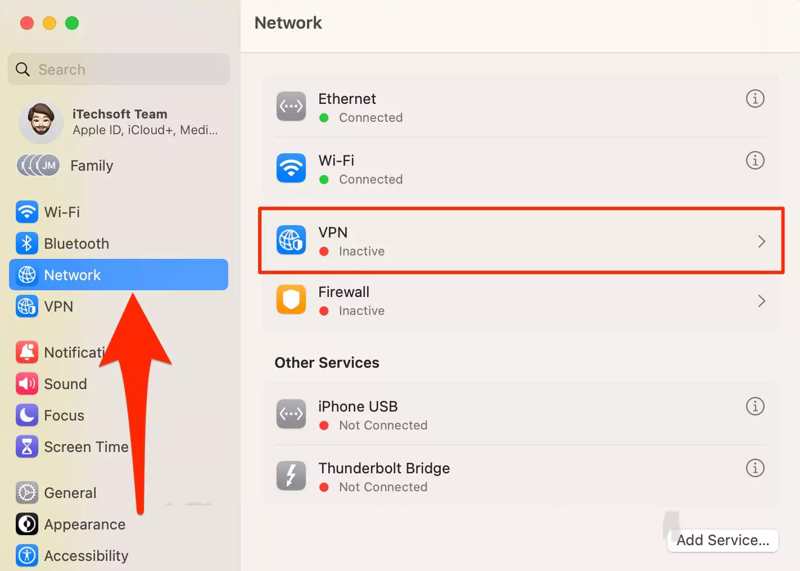
Solution 1: Disable VPN
If you are using a VPN on your device, your device location is different from the region that you set. As a result, you will fail when creating an Apple ID. Therefore, you need to turn off the VPN on iOS or Mac.
Turn off the VPN on the iPhone
Step 1. Open the Settings app.
Step 2. Go to the VPN tab.
Step 3. Toggle off the VPN Status option.

Turn off the VPN on the Mac
Step 1. Go to the Apple menu and choose System Settings or System Preferences.
Step 2. Click Network on the sidebar.
Step 3. Select your VPN connection on the list and click Disconnect.
Solution 2: Verify Information
When making an Apple ID, you need to provide your personal and payment information. If you encounter an error that says you cannot create an Apple ID, you should check your information and make sure it is accurate, especially your email address and password.
Solution 3: Correct Date and Time
The wrong date and time may be responsible for you not being able to create an Apple ID. The solution is simple: Correct the date and time on your device. You can follow the steps below to correct them.
Correct Date and Time on iPhone/iPad
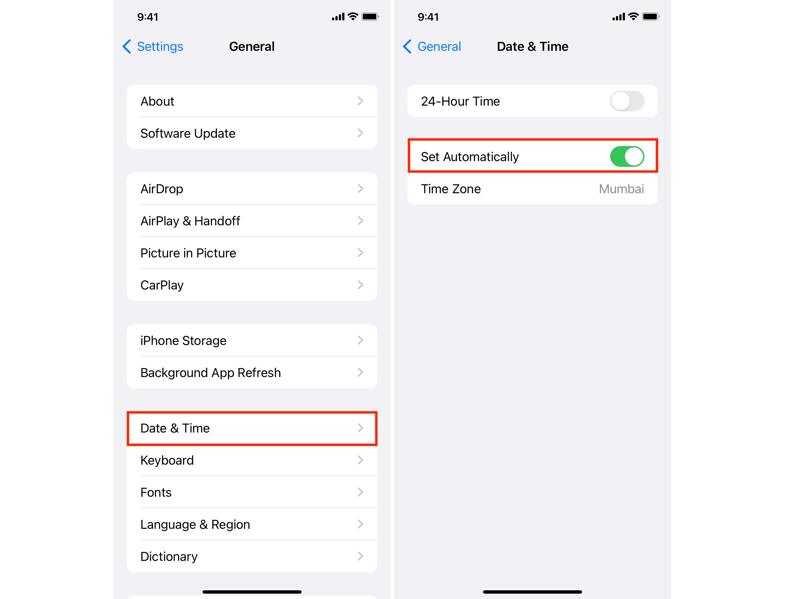
Step 1. Run the Settings app and go to General.
Step 2. Tap Date & Time.
Step 3. Toggle on Set Automatically.
Correct Date and Time on Mac
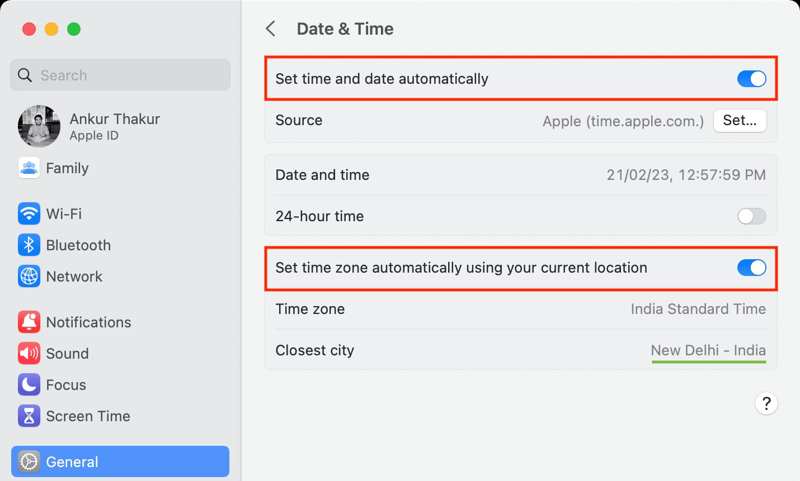
Step 1. Choose System Settings from your Apple menu.
Step 2. Go to General and choose Date & Time.
Step 3. Toggle on Set time and data automatically.
Solution 4: Enable Location Services
When making a new Apple ID, it detects your geolocation through GPS on your device. If Location Services is disabled, Apple cannot locate your region, and you cannot create an Apple ID.
Enable Location Services on iPhone/iPad
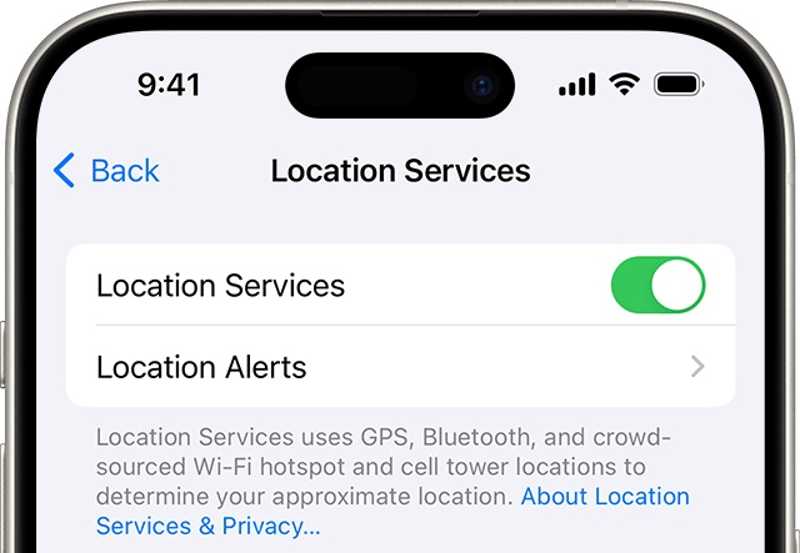
Step 1. Go to Privacy & Security in your Settings app.
Step 2. Choose Location Services.
Step 3. Toggle on Location Services.
Enable Location Services on Mac
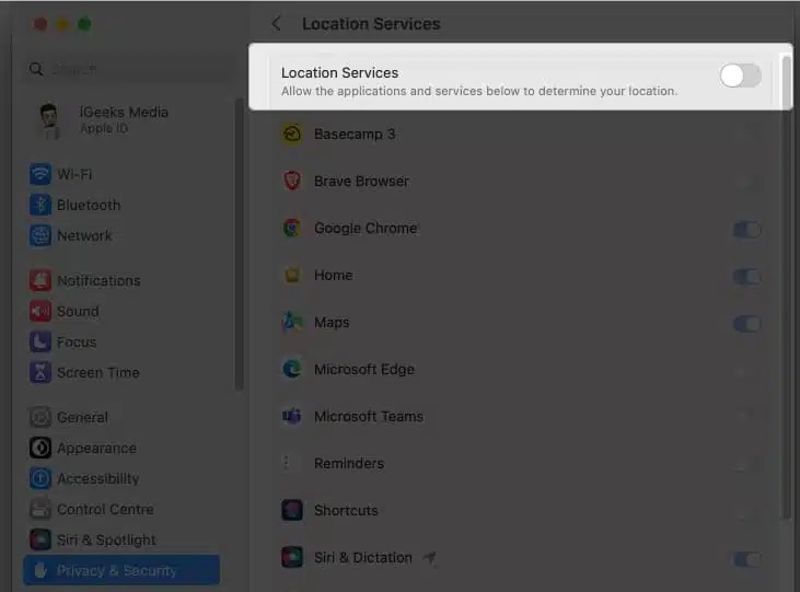
Step 1. Click the Apple menu and choose System Settings.
Step 2. Head to Privacy & Security on the sidebar.
Step 3. Click Location Services and toggle on Location Services.
Part 4: How to Remove Apple ID Without Password
Sometimes, you may want to sell your old iPhone or give it to others. You'd better remove your Apple ID from your device. The process requires your Apple ID password. If you forgot your Apple ID password, Apeaksoft iOS Unlocker is the best option to wipe the old Apple ID effectively.
The Best Way to Remove Apple ID from iPhone/iPad Without Password
- Unlock Apple ID from an iOS device without the password.
- Available in various situations, including a crashed iPhone.
- Offer bonus features, like MDM bypass.
- Support a wide range of iPhone, iPad, and iPod devices.
Secure Download
Secure Download

How to Remove Apple ID Without Password
Step 1. Connect your iPhone
Launch the best Apple ID removal software after installing it on your PC. There is another version for Mac. Connect your iPhone to your computer with a Lightning cable. Choose the Remove Apple ID mode, and the software will detect your device immediately.
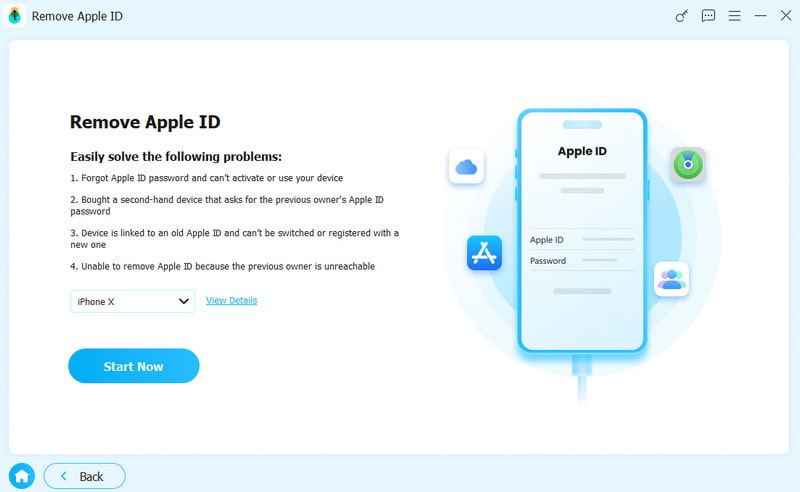
Step 2. Remove Apple ID
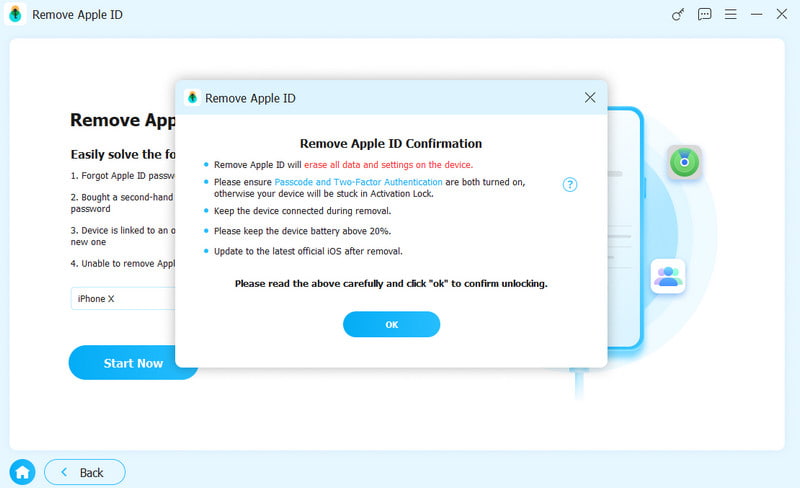
Click the Start button to begin removing Apple ID from your device if Find My is disabled.
If Find My is enabled, you should reset your iOS device first by following the onscreen instructions. Then, press the OK button and click Confirm Again. You can also remove MDM from your iOS devices.
Conclusion
This guide has explained how to create a new Apple ID on an iPhone, iPad, Mac, or online in various situations. Moreover, you can sign up for an existing account on your Apple product. Apeaksoft iOS Unlocker can remove your Apple ID without requiring a password. If you have other questions, please write them down below this post.
Related Articles
Forgot your Apple ID password? Don't worry! This post will show you how to make use of iforgot.apple.com to unlock your Apple account password in detail!
Unlocking iPhone can be a headache, especially if you don't know the limit. This article will tell you how many attempts you can make and how to restore safely.
When your device says your iPhone is locked to its owner, don't worry. It doesn't mean your phone is dead. With the right tools, your device can be restored.
If you forgot the passcode to your iPhone or iPad, you can learn the top 5 best iPhone unlock applications from our article.
