


How to Get to iOS Setup Assistant - Set up Your iPhone Like a Pro

Many iPhone users encounter the iOS Setup Assistant when activating a new device, migrating data between devices, or fixing system issues. However, most of us are not aware of its specific functions, how to turn it on, and how to use it to transfer data.
This article provides a beginner-friendly, step-by-step guide to the iOS Setup Assistant, including what it is, how to access it, and how to transfer data across devices.
PAGE CONTENT:
Part 1: What is iOS Setup Assistant
The iOS Settings Assistant is a system configuration wizard built into the iOS system. It is a native feature available on every iPhone and iPad device. You can think of it as a "guide" who will lead you step by step through the key settings, such as language, network, and Apple ID, after you first turn on the device or reset it, ensuring a smooth iPhone use experience.
Its core function is to guide users through the process of initializing the device and performing basic settings. Specifically, it includes setting the language and region, connecting to the network, logging in with an Apple ID, entering the Face ID password, and transferring data between the old and new devices.
Part 2: How to Get to iOS Setup Assistant
Where is the iOS Setup Assistant? You may find that there is no access on the Home screen or in the App Store. This is because the iOS Setup Assistant is not an application that can be directly opened on the home screen or manually downloaded from the App Store. Therefore, you won't see its icon on the main interface of your iPhone or iPad.
Instead, iOS Setup Assistant is a system-level boot process that is automatically triggered in certain circumstances, such as when you power on a brand-new device for the first time or after restoring it to factory settings. Once the setup process is completed and you reach the Home screen, the setup flow ends, and the iOS Setup Assistant will not appear again unless the device is reset.
How to access the iOS Setup Assistant? For a brand-new iPhone or iPad, the Setup Assistant will automatically appear as soon as you power on the device. For devices that are not brand new, you can access the iOS Setup Assistant by erasing all content and settings on the device. Follow the steps below:
Step 1. Go to Settings on your iPhone or iPad.
Step 2. Go to General - Transfer or Reset iPhone - Erase All Content and Settings.
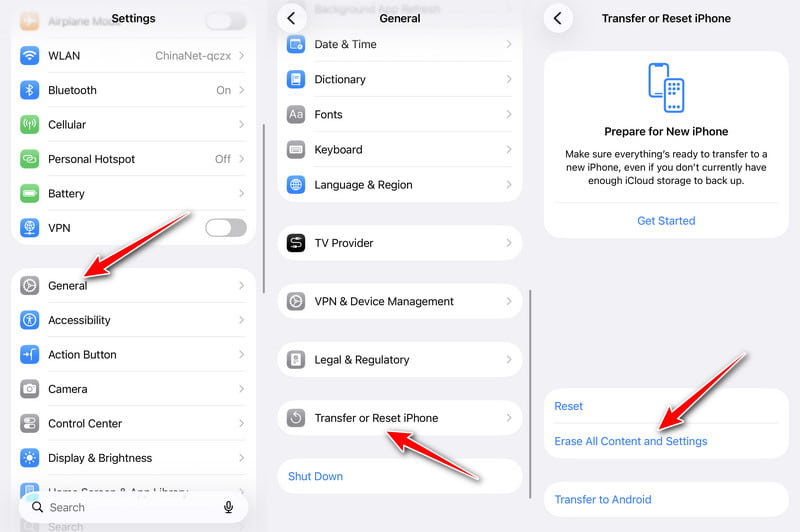
Step 3. Enter your screen passcode and confirm your operation.
Step 4. Wait for the device to restart. The iOS Setup Assistant will appear automatically.
Tips: Do remember to back up your iPhone before erasing it.
Part 3: Step-by-Step Tutorial for iOS Setup Assistant
Before You Start
- Charge both iPhones to over 50%.
- Get a stable Wi-Fi network ready for activation.
- Turn on Wi-Fi and Bluetooth on your old device (if you have one).
- Prepare your old iPhone passcode and Apple ID credentials (if you have one).
- Update your old iPhone to the latest iOS version (if you have one).
- Use a transfer cable if you have large amounts of data to migrate.
Step-by-Step User Guide
Step 1. Select your language and region.
Step 2. Choose your device preferences.
Step 3. You will see the Quick Start interface pop up automatically if you place your old iPhone right next to the new one.
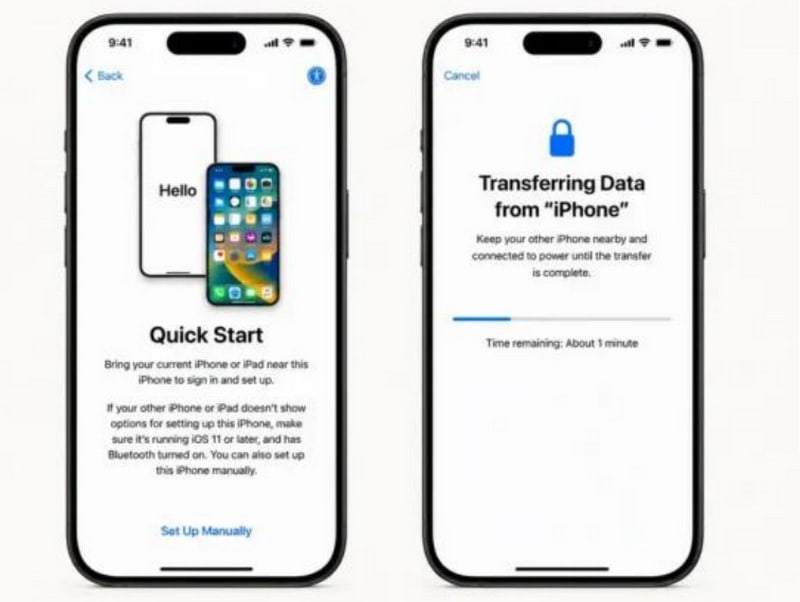
Tips: If you don't have another iPhone, just click Set Up Manually and skip to Step 6.
Step 4. Use your other iPhone to scan the blue animated sphere on the new device to pair them.
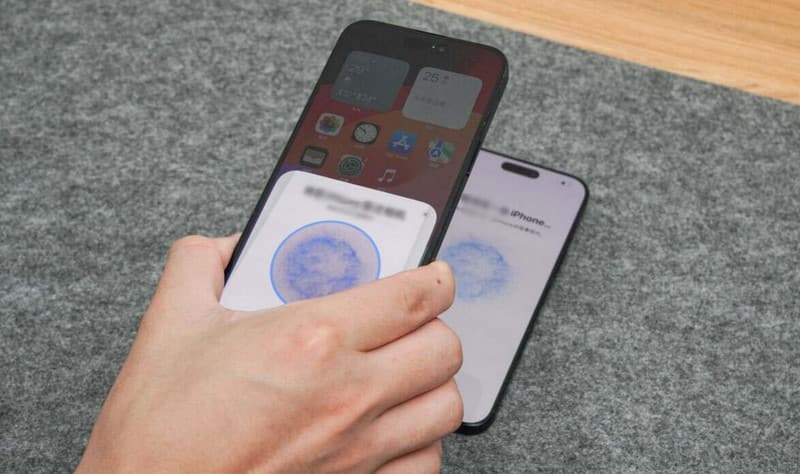
Step 5. Enter your other iPhone's screen passcode on the new iPhone to authorize data transfer.
Step 6. Connect to a Wi-Fi network to activate your device.
Tips: Wi-Fi is required to activate your device. You cannot skip this step.
Step 7. Set up Face ID or Touch ID and create a 6-digit passcode to secure your device.
Step 8. Choose to transfer data from iCloud, another iPhone, Mac or PC, or even Android. Please check the detailed guide for different data transfer options in Part 4.
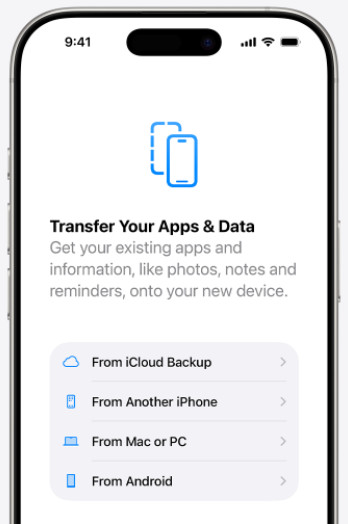
Step 9. Sign in with your Apple ID and agree to the terms and conditions to continue.
Step 10. Wait for the setup to complete, then access your Home screen.
Part 4: Data Transfer Options for iOS Setup Assistant Explained
Option 1: From iCloud Backup
If you don't have a computer or another iPhone at hand but have backed up your iPhone to iCloud, you can try to transfer data from an iCloud backup.
Reference: It took about 1.5-2 hours to restore around 60GB of data from an iCloud backup under normal conditions.
Step 1. Choose the From iCloud Backup mode.
Step 2. Sign in with the same Apple ID you used to create the iCloud backup, and complete two-factor authentication.
Step 3. You will see all the iCloud backups you've created. Choose the latest one. Then, wait for the device to download and restore the corresponding data.
Option 2: From Another iPhone
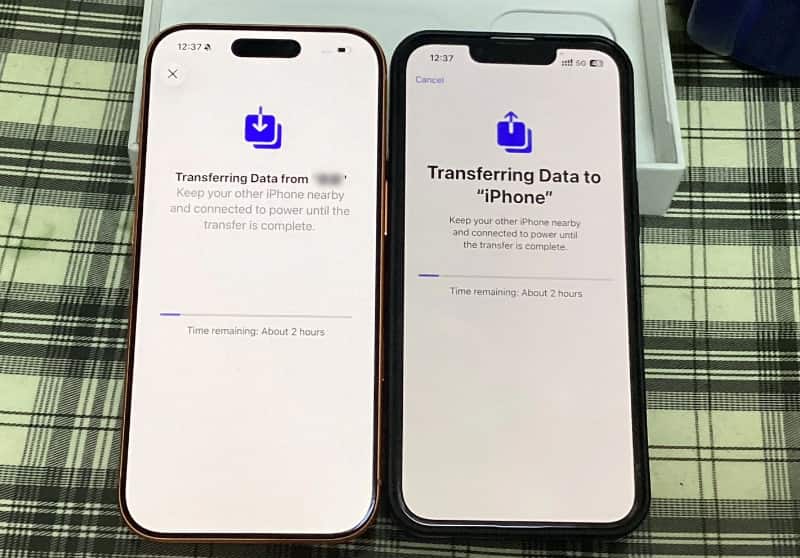
Transferring data from another iPhone refers to the Quick Start feature mentioned earlier. Please refer to Steps 4-5 in the above part for full detailed steps.
Reference: Based on our internal test, transferring 240GB of data from iPhone 14 to iPhone 17 Pro using Quick Start took approximately 2 hours.
Option 3: From Mac or PC
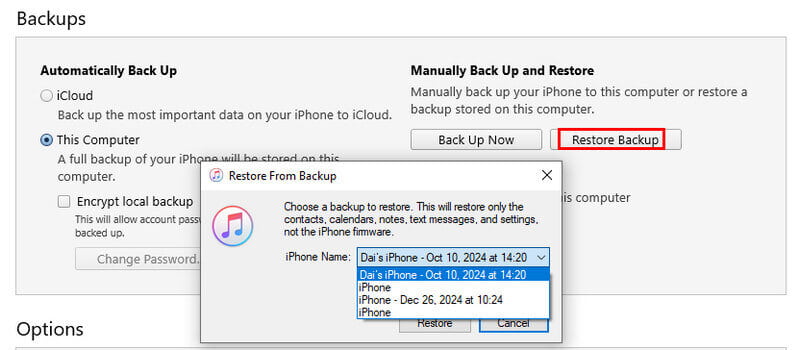
If you've created full local backups on your desktop and need to restore large volumes of data completely, just choose the From Mac or PC mode.
Reference: In our test, restoring a 60GB local backup from iTunes took approximately 1-1.5 hours.
Step 1. Connect your iPhone to a computer with the original cable. Trust this computer on your iPhone.
Step 2. Open iTunes (Finder for Mac). Click your device from the sidebar.
Step 3. Click Restore Backup and select the latest backup. Wait for the device to restart automatically and complete the data restore.
Option 4: From Android
If you previously used an Android smartphone and are switching to an iPhone, you can also use iOS Setup Assistant to move data from Android by choosing From Android.
Reference: We spent about 2.5-3 hours transferring around 200GB of data from an Android device to an iPhone under normal conditions.
Step 1. Download and launch Move to iOS on your Android phone first.
Step 2. Choose the From Android option from the APP &Data screen on your iPhone
Step 3. iPhone will generate a 6/10-digit verification code. Enter the code on your Android phone.
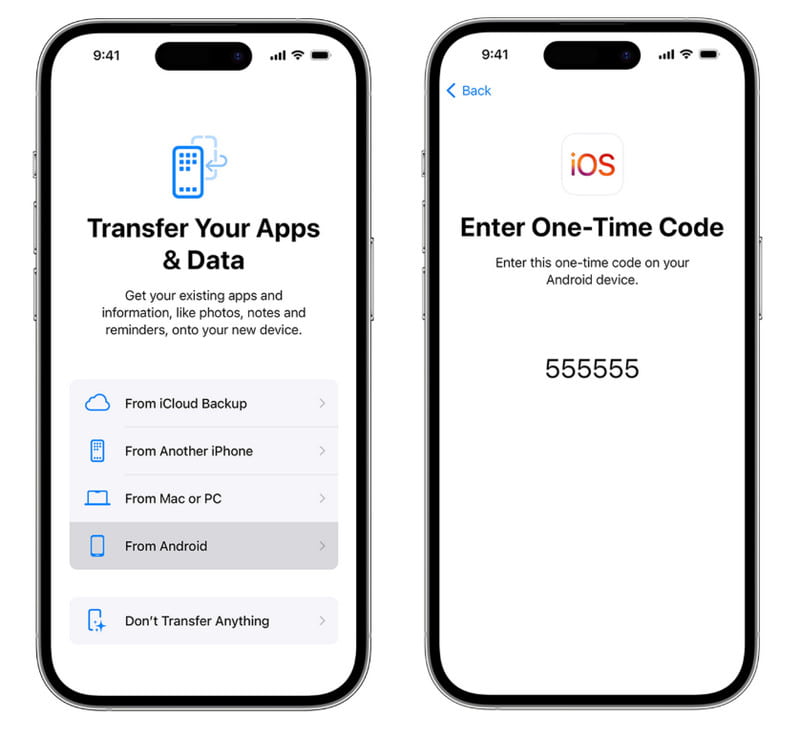
Step 4. Check the data you want to sync and start transferring data.

Downloaded by over 1,000,000 users
- Transfer data among iOS devices and computers quickly.
- Selectively choose files to transfer so you can decide to move what you need.
- Preview files before transferring data.
- Support bulk transfer of photos, videos, music, contacts, and other iOS data in one click.
Secure Download
Secure Download
Conclusion
This post has introduced iPhone iOS Setup Assistant in detail, including what it is, how to access the setup screen, and how to use it to transfer data from iPhone or Android devices. And if you are looking for a faster way to transfer data between iPhones, don't miss Apeaksoft iPhone Transfer.
 Apeaksoft iPhone Transfer
 Transfer iOS data among iOS devices, computer and iTunes.
Secure Download
Secure Download
Related Articles