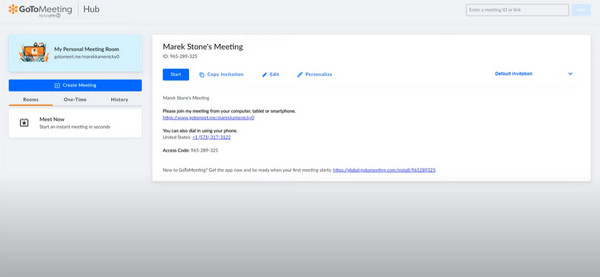
GoToMeeting, as one of top choices for meetings in the business life, is closely linked to our office routine, It provides a mobile platform where every member is allowed to attend the meeting and discuss over important issues in spite of time and distance.

In this article, we have list 3 different ways on how to record GoToMeeting, including GoToMeeting recording with its built-in recorder, a third-party software on your desktop as well as an online option. Just read it and choose the one you prefer.
- Part 1: Information about GoToMeeting
- Part 2: Record GoToMeeting with Its Built-in Recorder
- Part 3: Record GoToMeeting with Professional Software
- Part 4: Online Solution for GoToMeeting Recording
- Part 5: FAQs of Recording GoToMeeting
Part 1: Information about GoToMeeting
GoToMeeting is a desktop application developed by Citrix in July 2004. It is an efficient application favored by many white-collar workers, for it makes meetings more convenient regardless of external factors like weather, time, location, etc.
In fact, it is also an office software, which enables you to create online conference as well as discussions at real time on the Internet. To best save you from excess time and other costs to attend a meeting in the limited room people to people, you can still attend the meeting as usual with its help.
It is now providing two accounts, including a single account for small business or personal use, as well as a multi-user provided for corporates and big companies. You are allowed to record the meeting on GoToMeeting using some third-party software or its built-in recorder.
Part 2: Record GoToMeeting with Its Built-in Recorder
The quick-to-use way to do GoToMeeting recording on Windows/Mac is using the built-in recorder of GoToMeeting. For those who have the demand of GoToMeeting recording but don’t want to download any software on computers, the default screen recording function of GoToMeeting is quite useful.
Below is the guide of how to record GoToMeeting with its built-in recorder.
Step 1: Download and launch GoToMeeting on your computer firstly.
Step 2: Begin your meeting by Start button.
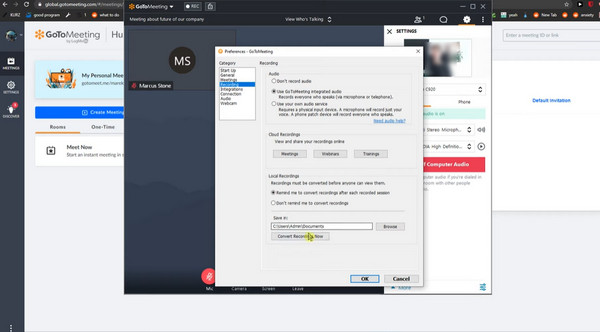
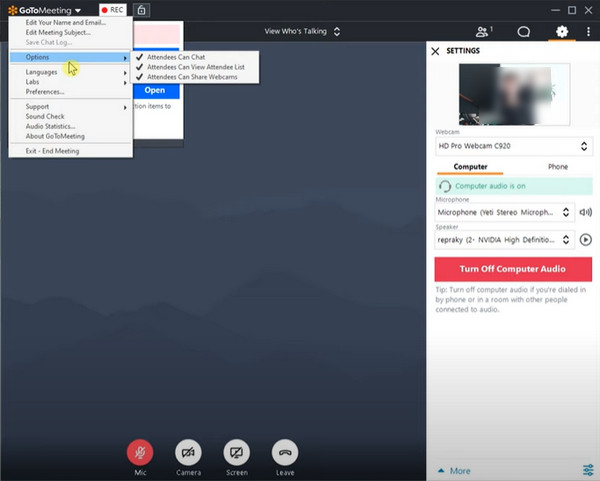
Step 3: Reach Gear button for setting on the right corner of the meeting window, then tap on Preference to find Recording. Set all options to fit your needs.
Step 4: After that, click Rec button to start your recording. Now you can see the recording button turns glowing.
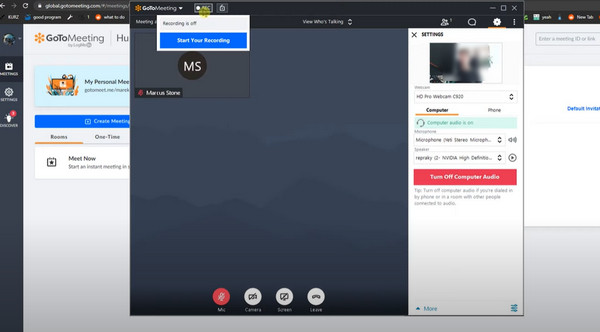
Step 5: During your recording, you can move your mouse over Rec and GoToMeeting button and just feel free to select the options like notes, attendees and more.
Once the meeting is finished, remember to stop and save your recording for use.
Part 3: Record GoToMeeting with a professional software
In spite of the accessible usage of the built-in recorder, it’s obvious to tell the shortcoming that you are limited to record the meeting with rights reserved to the host. Thus, if you are looking for a reliable software to record GoToMeeting freely, then the most recommended software is using Apeaksoft Screen Recorder.
Apeaksoft Screen Recorder is the most professional way to record your screen or audio, as well as capture your screen. When you want to do GoToMeeting recording, this screen recorder can be your best assistant.
Key features:
- Compatible with popular Windows and Mac computer;
- Allow you to set recording area based on your GoToMeeting.
- Record webinar, video tutorial, gameplay, etc. apart from GoToMeeting.
- Freely record system audio, microphone audio or both.
- Help you output videos in really high qualities.
- Let you record streaming audio, online audio, as well as microphone voice.
- Free for you to set the output format, video quality and frame rate before recording.
- Allow you to record video and audio very smoothly and never interrupt your other desktop tasks.
How to record GoToMeeting video
In the following steps, we will take this software to record GoToMeeting on Windows as the example. For Mac users, you can visit this page to record video and audio on Mac for GoToMeeting.
Step 1: Download Screen Recorder
First of all, you need to choose the suitable version of Apeaksoft Screen Recorder and then download it on your computer. When you finish the installation, you are able to launch this software on your computer.
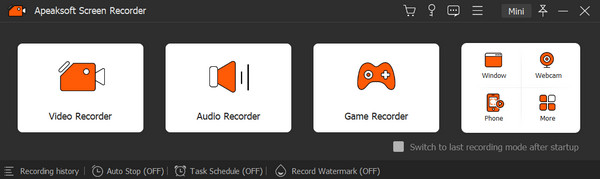
Step 2: Choose Video Recorder
Choose Video Recorder from the main interface, and then you will get into Video Recorder mode.
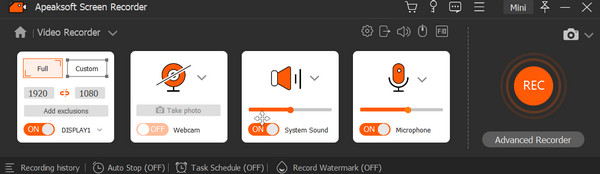
Step 3: Make recording settings
Now you are free to adjust the recording to fit in with your needs. You can go through the choices in a row among the recorded area, webcam, system sound and microphone. If you would like to voice your opinions, just turn on the Microphone when needed. And to get the sound of other members in the meeting, turn on System Sound as usual.
Step 4: Begin and edit GoToMeeting recording
When you have done all things, just wait for the meeting begin. When it begins, you are able to click on the red REC button to record the GoToMeeting. After it is finished, you can preview it and make slight changes in the pop-up window. In the bottom line you are allowed to change the video length, choose advanced trimmer or playback as you like.
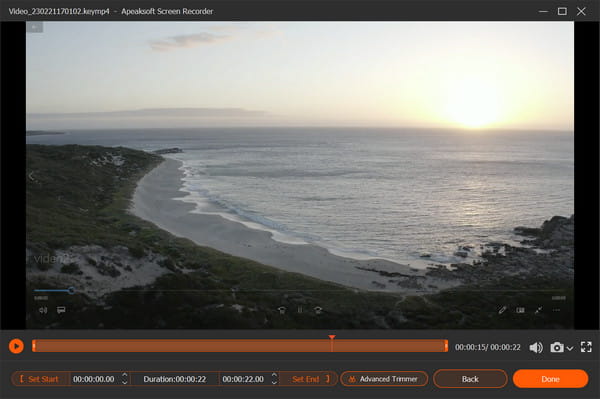
Step 5: Save your videos
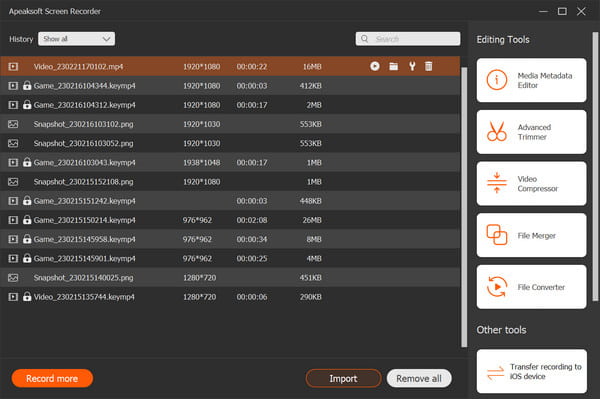
Now it’s time to save your recording. You can click Import button to get your result.
Tip: As a Mac user, you are also encouraged to seek more solutions to record your meeting screens on top 10 screen recorders for Mac.
Part 4: Online Solution for GoToMeeting Recording
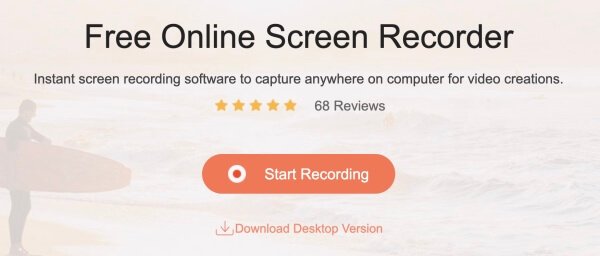
Besides the two ways, there still is an online way on how to record GoToMeeting. The online recorder we strongly recommended to you is called Apeaksoft Free Online Screen Recorder.
It is a useful tool which allows you finish the GoToMeeting recording on your webpage. What’s more, it also enables you to record whatever you want only with a few clicks of a button.
If you desire for a GoToMeeting recording without any software downloading, but don’t want the attendees to know, this online solution is the best choice for you.
Step 1: Visit Apeaksoft Free Online Screen Recorder with your browser. And then click on Start recording to begin the process.
Step 2: When the window pops up, you are able to preset the options as you like. And you need to choose system sound and microphone as the audio input.
Step 3: Now you need to launch GoToMeeting and adjust the recording area based on GoToMeeting.
Step 4: When all things are done, click on REC button. And after three seconds, this tool will begin working.
Step 5:You are able to add something you like during the recording process. When it is finished, click Pause button and this online recorder will play the video automatically. You are able to preview it and adjust it based on your needs.
Don't Miss: How to Record CyberLink U Meetings.
Part 5: FAQs of Recording GoToMeeting
1. Can I record GoToMeeting on Mac?
Once you have started your GoToMeeting session on your Mac, do the following: At the bottom of the Screen Sharing pane, click Record.
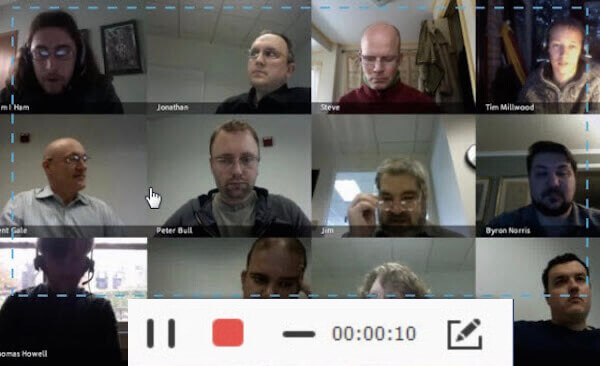
2. How do I record GoToMeeting webcams?
The webcams are displayed on the side if you are sharing your screen. If you only share your webcams they will be displayed side by side in the recording.
3. What is the best way to record a GoToMeeting session in high quality?
The best method to record GoToMeeting is to use an easy application named Apeaksoft Screen Recorder. It is the most full-featured capture tool and attracts many users’ attention for its simple recording operations and clear interface.
4. Where do GoToMeeting recordings get saved?
GoToMeeting offers two ways to save your recordings: in the cloud or on your local computer. If you use cloud recording, your recordings will be automatically saved online on your Meeting History page where you can view, download or easily share them.
If you choose to save recordings locally, they will download to the location you specify. By default they will be stored in C:\Users\/Documents.
Conclusion
It can be really easy if you follow this article about GoToMeeting recording. We have introduced three different methods in this article. All of them can help you record your meetings successfully. What you need to do now is just to choose the most suitable one and do your GoToMeeting recording freely!