Windows 10 is not the first version to have a built-in screenshot feature. Users on older systems rely on the Snipping tool and shortcut to do the job. As Microsoft keeps introducing new utilities into Windows, now you have multiple ways to screenshot specific area on Windows 10. However, that makes users confused. They are confused when and how to use the right functionality exactly. If you are in the same situation, this guide can help you sort out these utilities.

- Part 1: The Easiest Way to Screenshot Part of Screen
- Part 2: How to Screenshot Part of Screen with Shortcut
- Part 3: How to Screenshot Specific Area on PC with Snipping Tool
- Part 4: How to Screenshot Part of Screen on Windows 10
- Part 5: FAQs of Screenshot Part of Screen
Part 1: The Easiest Way to Screenshot Part of Screen
Some people just do not like the built-in screenshot utilities, partly because they are too simple to use. Apeaksoft Screen Recorder is another choice to screenshot a specific area on PC. Also, you can make use of it to screenshot part of screen on Mac with ease.

4,000,000+ Downloads
Take screenshot any part of your screen in one click.
Support customizable hotkeys and extensive options.
Totally free to use with no watermark or registration requirement.
Provide picture editing functionalities.
Briefly speaking, it is the easiest option to screenshot a part on your PC and macOS 15.
How to Screenshot Part of Screen on PC
Step 1 Set up Screen Recorder
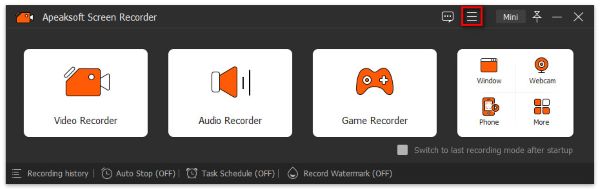
Run the best screenshot utility after you install it on your PC. It is compatible with Windows 10/8/7. If you want to customize options, go to the Preferences dialog from Menu button. Now, you can change Screenshot format, Location of screenshot files and more in Output tab, or customize shortcuts in Hotkeys tab. Click OK to confirm it.
Step 2 Screenshot a specific area
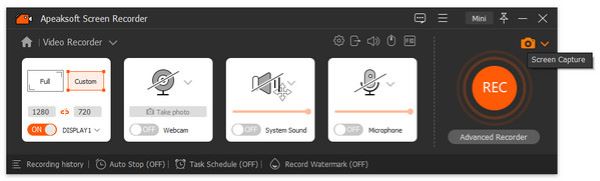
When you prepare to take screenshot, choose Screen Capture in the home interface. Then your cursor will turn to a cross. Click and drag your left mouse to cover the specific area.
Step 3 Edit and export screenshot
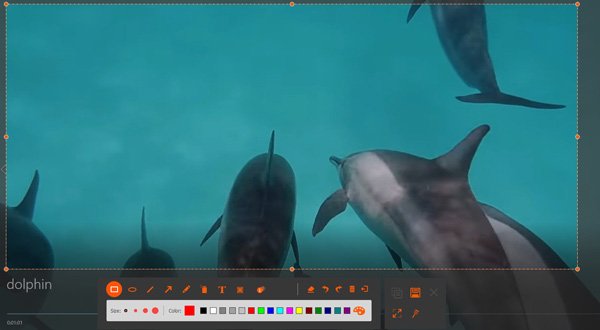
Once you release your left mouse, the toolbar will appear. The left panel provides several image editing functionalities, like shapes, text, draw, and more. If you are satisfied with the screenshot, locate the right panel on the toolbar. Hit the Clipboard button to send it to your clipboard for using in another app, or choose Disk button to save it to your hard drive.
Additionally, you can use this screen capture tool to record the video on your Windows PC.
Part 2: How to Screenshot Part of Screen with Shortcut
It is well-known that the Print Screen key is the simplest way to take a screenshot on PC, but it captures full screen. However, the key combination of Alt and Print Screen is able to screenshot a specific area, the active window on your desktop. This way works on almost all PC.
Step 1 When you want to screenshot a specific area on PC, especially the currently activate window, press Alt + Print Screen keys together. Windows will capture everything on the active window.

Step 2 Open MS Paint from the Start menu at the bottom left corner. Click the Paste menu on the top ribbon to paste the screenshot from clipboard.
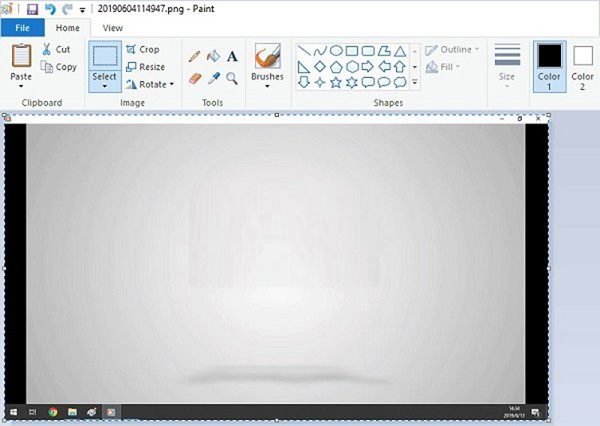
Step 3 Edit the screenshot, and go to File menu, choose Save As and save the screenshot to a proper folder.
Part 3: How to Screenshot Specific Area on PC with Snipping Tool
The Snipping Tool is built in Windows 10/8/7. It lets you screenshot part of screen or capture free-form. Though it is not very convenient to use, it is worth to try.
Step 1 Put whatever you wish to screenshot on your desktop. Go to the Start menu, search and open Snipping Tool.
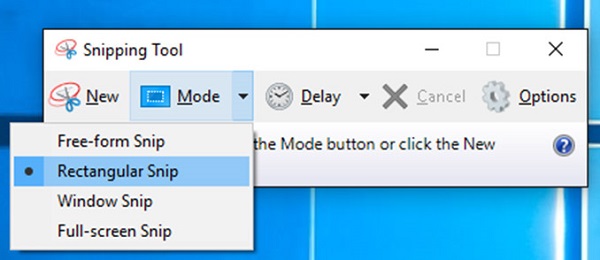
Step 2 Click the Mode menu and choose a proper mode. Rectangular Snip, for example, allows you to screenshot any rectangular area of screen. Free-form Snip mode is able to capture free area.
Step 3 Hit New menu when you are ready, and draw on the desired area. Release your mouse and the screenshot will go to the Snipping Tool.
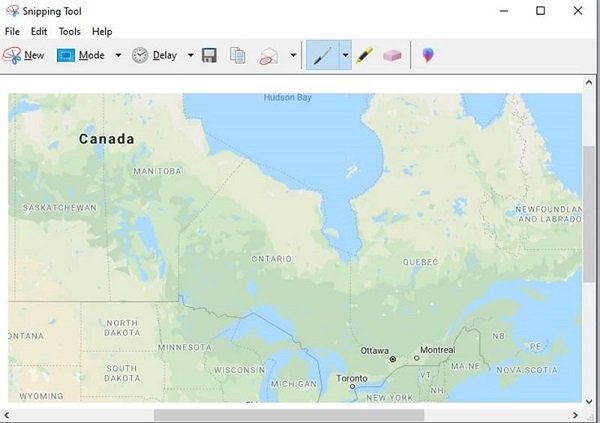
Step 4 Edit the screenshot and save it by hitting the Disk button. You can also send it to clipboard or via email.
Part 4: How to Screenshot Part of Screen on Windows 10
Snip & Sketch is the new utility on Windows 10 to screenshot a specific area. It is more like the compact version of Snipping Tool.
Step 1 When you’d like to screenshot a part of screen, hold down Windows + Shift + S on your keyboard. Then the Snip & Sketch bar will show up.

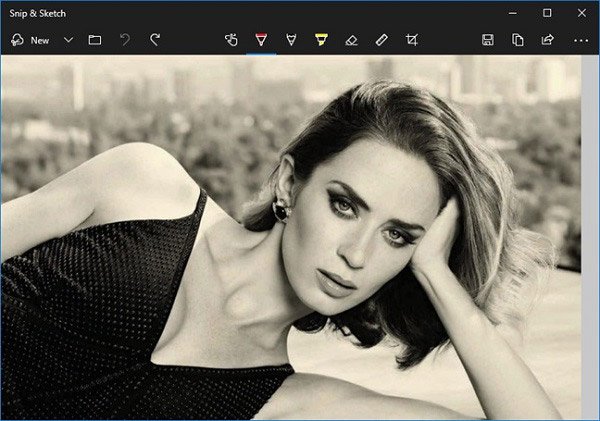
Step 2 There are four modes on the toolbar, Rectangular Snip, Freeform Snip, Window Snip, and Fullscreen Snip. Choose the right mode and drag your cursor on your screen.
Step 3 Let your left mouse go and the screenshot will be placed on the editor panel. Finally, click the Save button to export it to your hard disk or hit Clipboard button to send it to your clipboard.
Maybe you are also interested in taking screenshots in Windows Media Player.
Part 5: FAQs of Screenshot Part of Screen
Where does screenshot save to on Windows?
The answer depends on how you take the screenshot. If you press Windows + Print Screen key, your screenshot will be saved to the Pictures folder in C:/Users/[your username]/. Snipping Tool and Snip & Sketch allow you to select the destination manually.
How do you take a cropped screenshot on a PC?
Firstly, you can take a screenshot with the Print Screen key and crop it in MS Paint. Moreover, both Snipping Tool and Snip & Sketch offer the crop feature after screenshotting.
What is the shortcut to take a screenshot on Windows 7?
There are several shortcuts to take a screenshot on Windows 7:
Screenshot on full screen and send to clipboard: Print Screen.
Screenshot on currently active window and send to clipboard: Alt + Print Screen.
Screenshot on full screen and save in PNG image: Windows + Print Screen.
Screenshot on a specific area and send to clipboard: Windows + Shift + S.
Conclusion
This guide has shared you four ways to take a specific area on PC. Sometimes, you just want to capture a part of your screen but not full screen. Obviously, the Print Screen key along cannot meet your need. Fortunately, the shortcut, Snipping Tool and Snip & Sketch, as well as Apeaksoft Screen Recorder can help you take screenshot on Windows and Mac as you like for free. More questions? Please leave your message below.