Using snipping tools on your computer to capture shortcuts and copy the words is always a good thing to improve your working and studying efficiency. However, not every user on a PC is familiar with how to use snipping tool on Windows 11/10/8/7 and previous versions.
With this post, you can grasp a better understanding of Snipping tools and get effective instructions to take screenshots on your computer.

- Part 1: What Is Snipping Tool
- Part 2: How to Set Snipping Tool on Windows
- Part 3: How to Take a Screenshot
- Part 4: Best Alternative to Snipping Tool: Apeaksoft Screen Recorder
- Part 5: FAQs about Snipping Tool
Part 1: What Is Snipping Tool
As mentioned previously, Snipping tool is a pre-installed utility for Windows 10/8/8.1/7/Vista users to make screenshots. The Print Screen button on your keyboard is able to take a screenshot of the entire screen and save it to your clipboard. What's more, Windows 11 has provided users with an advanced version of Snipping Tool app in 2023, which enables the users to make screen recordings and select various modes based on the former functions.
Unlike the Print Screen button, the Snipping tool can capture any portion of your screen. Moreover, it provides several custom options and editing tools to make unique screenshots and recordings based on your needs.
The design of Snipping tool is a bit different on various Windows systems.
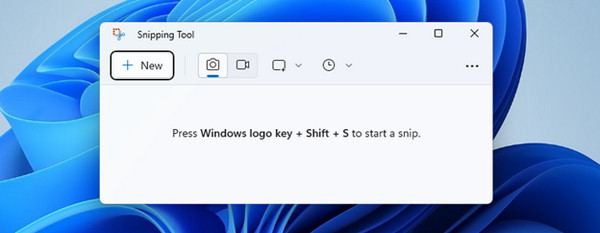
For Windows 11 users, hotkeys for snipping tools are supported and you can explore the functional areas in the main interface, including New, Snip, Record, Mode Switch and Delay button.
On Windows 10, you can find several options on the top ribbon, such as New, Mode, Delay, Cancel and Options.
On Windows 8 and earlier, only New, Cancel and Options are available on the screen. To set and use Snipping tool, you can continue reading for details.
Part 2: How to Set Snipping Tool on Windows
Before you use the Snipping tool, you should set the basic options to specify how it behaves and looks.
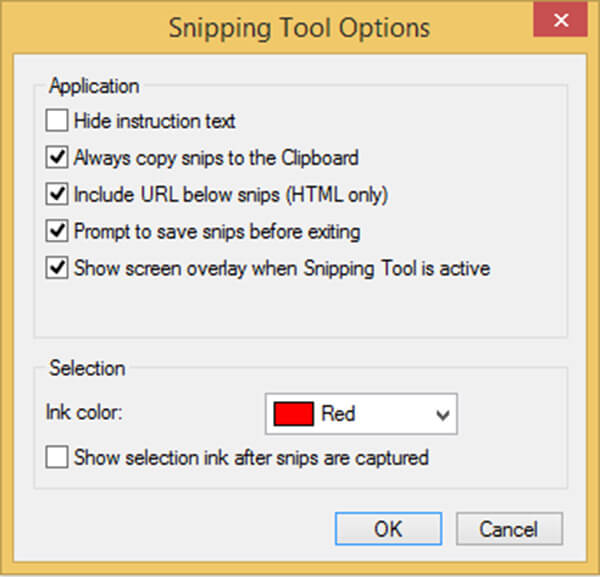
Click the Options menu on the top of the Snipping tool window to open the Options dialog.
There are two sections on the dialog, Application and Selection. You can find several options in the Application area:
Hide instruction text: hide the prompt under each button when using Snipping tool.
Always copy snips to the Clipboard: send screenshots to your clipboard directly.
Include URL below snips: include the URL of the webpage in your screenshots when using Snipping tool to capture web pages. It is only available if you save the screenshot as HTML file.
Prompt to save snips before existing: save all screenshots you have not saved when closing the Snipping tool.
Show screen overlay when Snipping Tool is active: show a white overlay to tell you the recording area. You can check and uncheck the options based on your need.
There are two options in the Selection section. If you tick the checkbox next to Show selection ink after snips are captured, you can set the Ink color as you wish.
Even you using the tool on Toshiba computer, the steps of screenshotting Toshiba are the same.
Part 3: How to Take a Screenshot
With the update of Snipping tools on Windows 11 and 10, its settings are bounded with more powerful functions. See how you can take a screenshot on different versions of Windows below.
How to Take a Screenshot on Windows 11
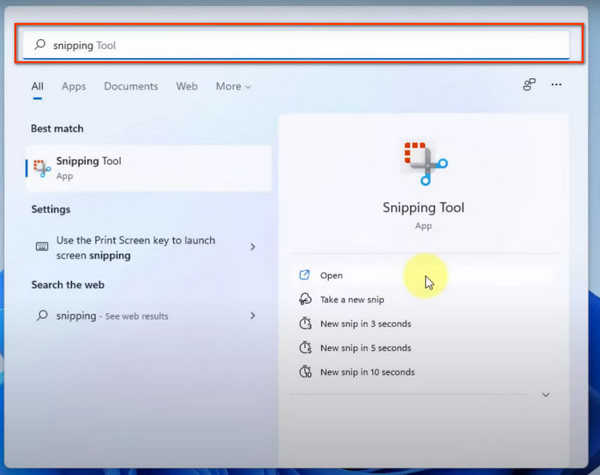
Locate yourself at the Search bar and input Snipping Tool to find the app.
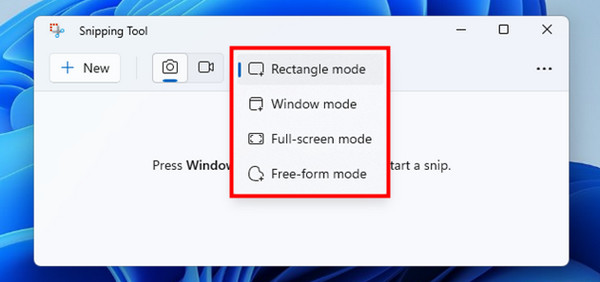
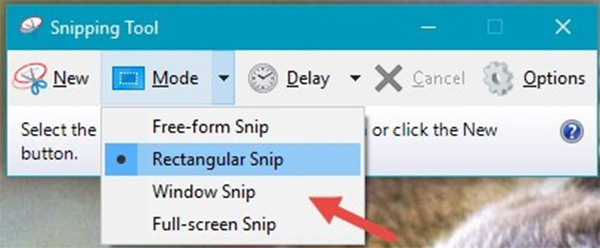
Then you can click the Mode button to select a mode before you take a screenshot. Choose the Rectangle mode if you want a regular screenshot, Window mode for a specific window, Full-screen mode for the whole screen content and Free-form mode to outline and record whatever you like.
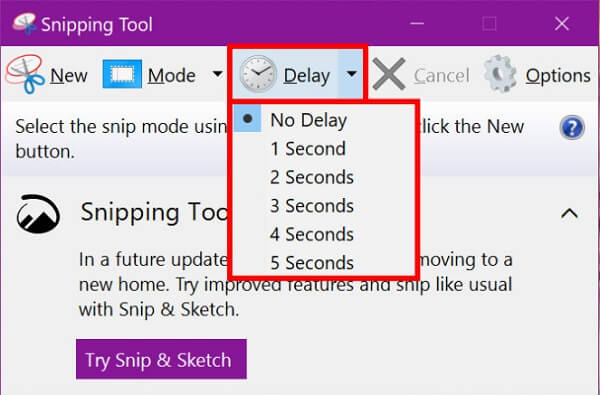
If you want to change the screen settings before you take the screenshots, click the Delay button and set the timing to fit.
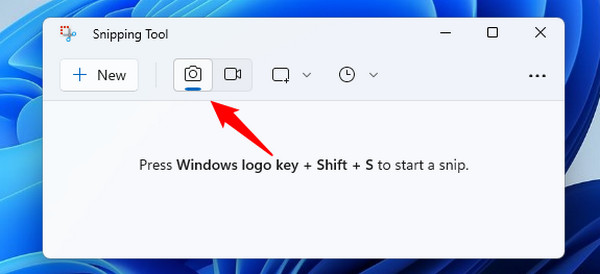
After that, you can reach the Snip button to take a screenshot easily.
How to Take a Screenshot on Windows 10
Press the Start menu at the bottom left corner, and then search for and open Snipping tool for use.
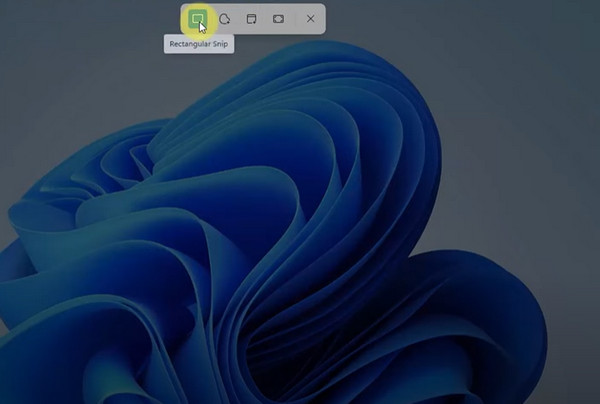
Click and expand the Mode menu on the top ribbon and choose a snip shape, such as Rectangular Snip. If you want to capture an irregular shape, choose Free-form Ship.
To make a delayed screenshot, unfold the Delay menu and decide how many seconds the Snipping tool waits.
Next, hit the New menu, click the starting point and drag your mouse to cover the desired area. Once release your mouse, the screenshot will present on Snipping tool.
How to Take a Screenshot on Windows 8 and Earlier
When it comes to Windows 8 or earlier, you can still open the Snipping tool from the Start menu.
Click the Downward button next to the New menu. Then you can choose the screenshot shape, which is the same with the Mode menu on Windows 10.
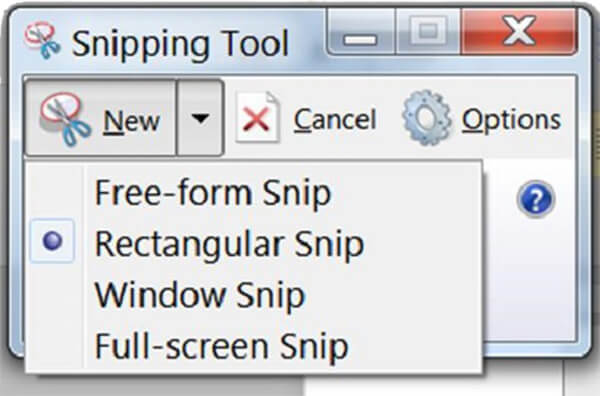
If you are ready, click the New menu to make a screenshot.
How to Edit The Screenshot within Snipping Tool
For Windows 11:
After you capture a shortcut, you can see the following interface as below.
Then you can view all editing tools at the bottom. You can use the Pen and Highlighter to make drawings or writings manually. Remove any unwanted settings with the Eraser or the Undo and Redo button. Other tools like Ruler, Touch Writing and Crop are also supported.
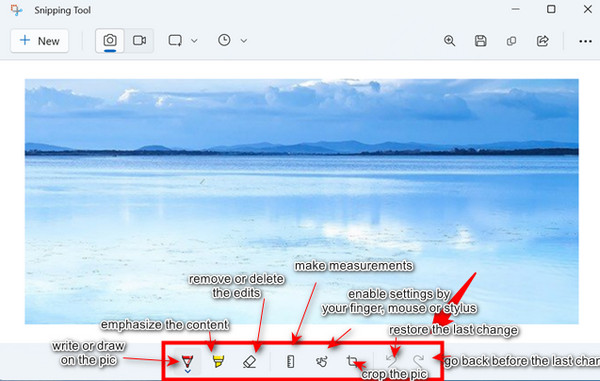
After that, you can magnify, print, copy and share the editing with the buttons on the top right corner.
For Windows 10 and previous:
After using Snipping tool to make a screenshot, you will be presented with the editor window.
Use the Pen of Snipping tool to write down annotations on your screenshot. The Highlighter tool is used to emphasize important areas. If you are not satisfied, use the Eraser to remove them.
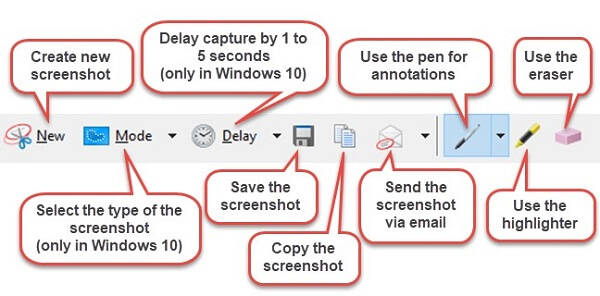
Finally, you have several ways to use the screenshot in Snipping tool. Click the Save button to open the save dialog, drop a name and destination, and click Save. To store the screenshot in your clipboard, click the Copy button. Moreover, you can share the screenshot by hitting the Share button.
Part 4: Best Alternative to Snipping Tool: Apeaksoft Screen Recorder
Despite the great convenience of Snipping tool, you will encounter problems like Snipping tool not working on Windows 11, no channel to the MacBook Snipping tool, etc. With the limitations of the operating system and abrupt errors, it seems not a perfect utility.
Thus, we recommend Apeaksoft Screen Recorder for both Windows and Mac users to take screenshots smoothly and quickly as the best alternative.

4,000,000+ Downloads
Record everything on your screen and make a recording video.
Take screenshots on Mac and Windows while capturing your screen.
Include extensive features, like drawing tools, media player, etc.
Control the screen recording with hotkeys based on your preferences.
How to Use the Alternative to Snipping Tool
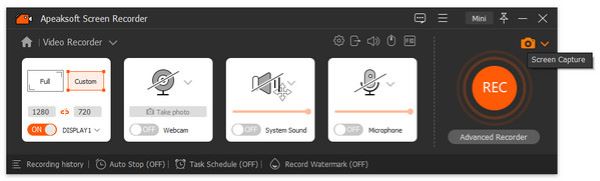
Download and install the alternative to Snipping tool to your PC. There is another version for Mac. Launch it and choose Screen Capture in the main interface to open the snapshot window.
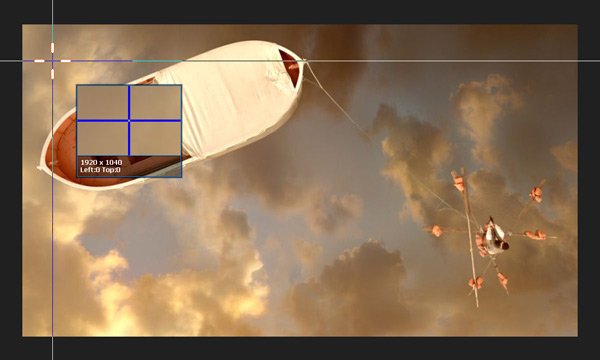
Then your cursor will become the shape of a cross. Click on the very top left point of the area you want to capture, and then drag and move your mouse. Make sure to cover the entire area. You can monitor the dimension of the area on-screen including the position of your cursor. It can be used to make the snapshot accurately.
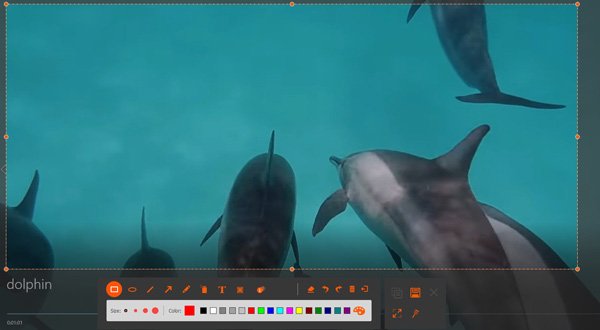
Once you release your mouse, the snapshot will be captured. Then you can draw it or add text on the next window. Finally, you can copy the screenshot to your clipboard or save it to your hard drive.
Part 5. FAQs about Snipping Tool
Is there a snipping tool for Mac?
Of course. And you can get snipping tools for Mac with third-party software like Apeaksoft Screen Recorder and use these snipping tools to take shortcuts easily.
How do you snip on Windows without Snipping Tool?
You can use the hotkeys match like Alt+ PrtScn or Windows+ Shift+ S (Windows 11) to take screenshots quickly without launching the Snipping Tool manually.
Why can't I snip on Windows?
Here are possible causes: insufficient internal storage space, system updates, incorrect settings on delay timing, editing and so on. Please check before you take a snip on your PC.
Conclusion
Now, you should understand what Snipping tool is and how to use the Snipping tool on Windows. More questions? Please leave your messages in the comment area below.