How to crop the screenshot on your MacBook? What are the best methods to capture specific portions of your Mac screen? Of course, you can simply use the default methods to get the desired screenshots, such as the keyboard combo, Preview, Photos, and more. Is there an alternative to cropping the screenshot on Mac? Just learn more about the process from the article.

- Part 1: How to Crop and Edit Screenshots on A MacBook
- Part 2: How to Crop A Screenshot on Mac with Preview
- Part 3: How to Crop Screenshots on Mac via Grab
- Part 4: How to Crop A Screenshot on Mac with Photos
- Part 5: How to Crop Screenshots on Mac via Buttons
- Part 6: FAQs about How to Screenshots on Mac
Part 1: How to Crop and Edit Screenshots on A MacBook
If you need to take, edit and manage a screenshot on MacBook with ease, Apeaksoft Screen Recorder is a versatile screen recorder to capture screen videos, record audio files and take snapshots. Moreover, you can also tweak the audio/video settings, add annotation/shapes/watermark, crop/edit/manage the screenshots on Mac with ease.

4,000,000+ Downloads
Record screen video, capture audio files and even take snapshots.
Tweak the photo format, capture area, photo quality and more others.
Add annotations, watermark, shape, text, line, arrow, callouts, etc.
Crop the screenshot, apply filters, remove and manage the photos.
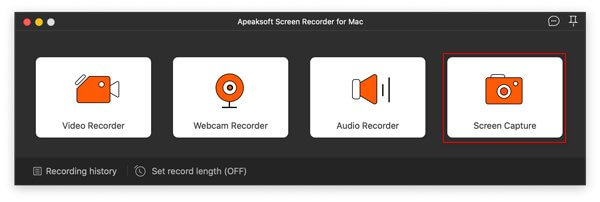
Step 1Download and install the snipping tool on your computer. Launch the program on your computer and choose the Screen Capture option. Then your mouse will be the shape of a cross to crop the screenshot.
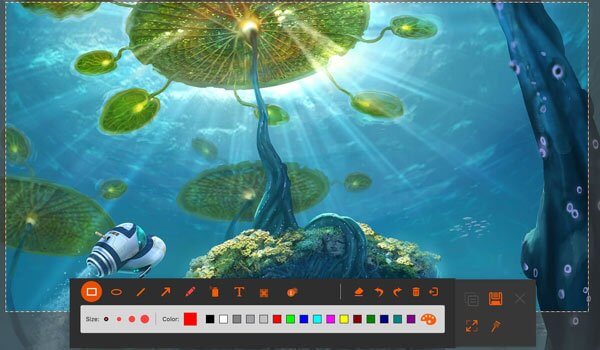
Step 2Once you have selected the desired area, you can crop a portion of your Mac screen. Then you can add an annotation, draw the borderline, apply watermark and blur according to your requirement.
Part 2: How to Crop A Screenshot on Mac with Preview
Preview for Mac not only provides the editing features, it also enables you to crop the screenshot on Mac. By default, you can simply double-click an image file and it will open in Preview. Then you can crop, resize, rotate, annotation and edit the photos with ease.
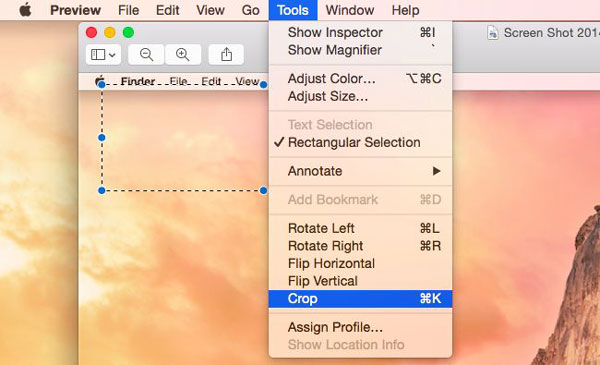
Step 1In order to select the area, simply drag your mouse cursor over the areas you intend to crop out.
Step 2Click the Tools option and choose the Crop button afterward and preview will crop the selection, cutting out the desired part.
Step 3Once you have captured the desired area, you can click the File menu and choose the Save to option to crop a screenshot on Mac. (Find where do screenshots go)
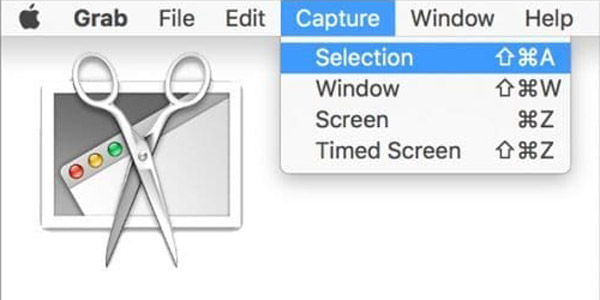
Part 3: How to Crop Screenshots on Mac via Grab
Grab is another method to crop a screenshot on Mac, which you can take and edit screenshots with ease. You can also take a time-delayed screenshot on Mac. Then press Command + Shift + 5 keyboard combination to launch Grab to get a desired screenshot as below.
Step 1Open the Grab app in the Launchpad on your MacBook. Of course, you can also find it in the Applications folder.
Step 2Choose a desired screenshot mode, such as the Selection, Window, Screen or Timed Screen to crop a screenshot on Mac.
Step 3From the File drop-down list, choose the Save button to export the screenshot as JPEG, PNG or TIFF.
Check what if screenshot not working on Mac
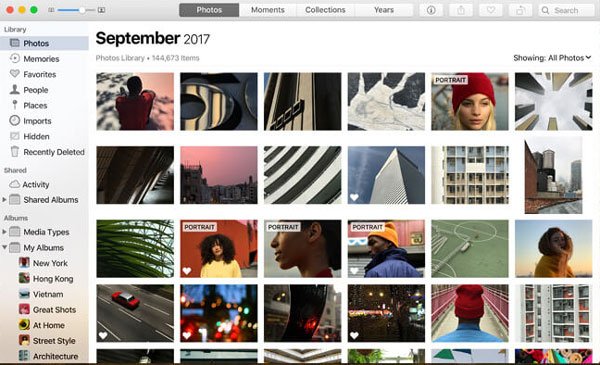
Part 4: How to Crop A Screenshot on Mac with Photos
When you need to crop and edit the screenshots from an iPhone or iPad, Photos is the in-built utility to touch up photos, which has the Aspect and Flip features to choose a desired ratio of the screenshot and flip the image as your requirements.
Step 1Open the screenshot in the Photos, which including the photos from your iOS devices. Choose a desired selection rectangle.
Step 2Drag the rectangle by its corners or edge. The cropped screenshot will appear as soon as you release the selection rectangle.
Step 3After that, you can straighten and align the edge with the grid to crop the screenshot on your MacBook accordingly.
Part 5: How to Crop Screenshots on Mac via Buttons
The default keyboard combo Shift + Command + 4 enables to turn your cursor into a crosshair, which you can select a desired portion of your screen to capture. If you need to crop a screenshot on Mac, you can use the Shift + Command + 4 + Space, hover your mouse over the window you want to crop, then press the Option to exclude window shadow from the screenshot image. It will be saved to your MacBook automatically.

Further Reading:
How to Record a Shared Screen Conference or Session on BigBlueButton
Part 6: FAQs about How to Screenshots on Mac
1. Why You Are Not Able to Screenshot on Mac?
If you need to crop a screenshot on a MacBook, which is related to the copyright, such as the Apple TV and other related Apple programs, then the Chrome Incognito mode will stop you from cropping screenshots on Mac. As for the case, you need to use Apeaksoft Screen Recorder instead. Or you can click here to find feasible solutions to fix screenshot on Mac not working.
2. What is The Best Alternative to Crop Screenshot on Mac?
When you need to get a specific area of a screenshot, you can resize an image as an alternative solution. It enables you to maintain the original aspect ratio to ensure the resized or the cropped image on your MacBook does not look stretched.
3. How to Capture Selected Portion on macOS Big Sur or Above?
A new floating palette brings the traditional Mac screen capture functions together under a single menu. You can access it by hitting Command-Shift-5. Then you can capture a portion of the screen using the mouse cursor as a crosshair selection tool.
Conclusion
When you need to crop a screenshot on your MacBook, you can learn more about the 5 most efficient methods from the article. Besides the default methods to take and crop a screenshot on Mac, Apeaksoft Screen Recorder is the best alternative to capture, edit, and manage the screen video, recorded audio, and snapshot with ease.