When you wonder how to take a screenshot on a Microsoft Surface Pro, what are the efficient methods to get the desired files? If you just need to have simple screenshots, you can take advantage of the default snipping tools, such as the keyboard combination, Surface Pen, hardware buttons, and more. Of course, you can also screenshot on a Surface Pro as a professional from the article.

- Part 1: 4 Best Methods to Screenshot on A Microsoft Surface Pro
- Part 2: FAQs about How to Take A Screenshot on A Surface Pro
Part 1: 4 Best Methods to Screenshot on A Microsoft Surface Pro
Method 1: How to Screenshot on Surface Pro as Profession
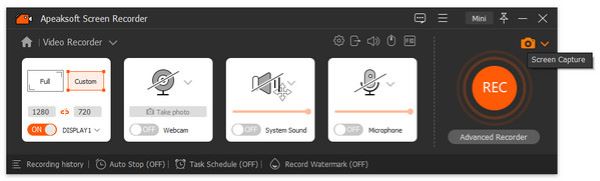
Whether you need to capture screenshots or screencasts, or edit/manage the photos with ease, Apeaksoft Screen Recorder is a versatile screen recorder to capture screenshot on a Microsoft Surface Pro. It enables you to tweak the video and audio settings, add annotation/mouse cursor/watermark, and even edit the recording with ease.

4,000,000+ Downloads
Take screenshots for full screen, a certain window and a customized area.
Customize the mouse cursor, recording area, and audio/video settings.
Add annotations, watermark, shapes, texts, callouts and more elements.
Manage and edit the recording within the built-in media library with ease.
Step 1Download and install the snipping tool, you can launch the program on your computer. After that, you can choose the Screen Capture option to take a snapshot according to your requirement.
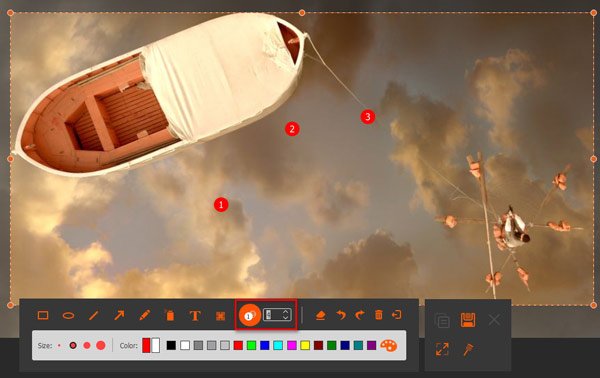
Step 2After that, you can select the desired area with the external mouse of your Surface Pro, which you can select a certain window, a full screen, or even customize the capture area.

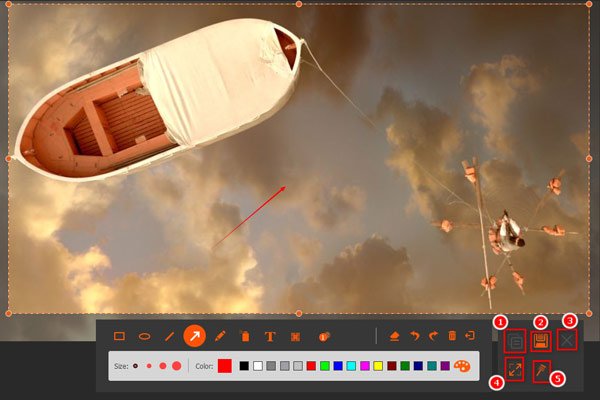
Step 3It also enables you to draw the border, add air brush/mouse cursor, or even apply the blur effect to the screenshot. You can also customize the size and color of the text and files with ease.
Step 4You can click the Disk button to save a screenshot on Surface Pro. It will pop up a window for you to select the save path before further editing the photos within the program.
Don't Miss:
How to Crop and Edit Screenshots on Mac
How to Record a Shared Screen Conference or Session on BigBlueButton
Method 2: How to Screenshot on Surface Pro with Hardware Buttons
If the type cover of your Surface Pro is not available at the moment, you can screenshot on Surface Pro with hardware buttons. Just learn more about the process with the following steps.
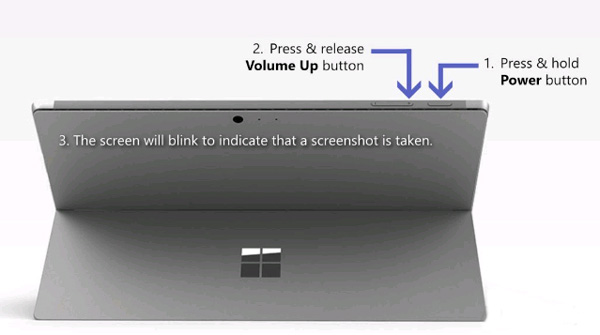
Step 1When you open the Microsoft Surface Pro, you can press and hold the Power button simultaneously.
Step 2Then you can press and release the Volume Up button while holding down the Power button.
Step 3All screenshots will be saved in a folder named Screenshots under the Pictures library. (See where do screenshots go)
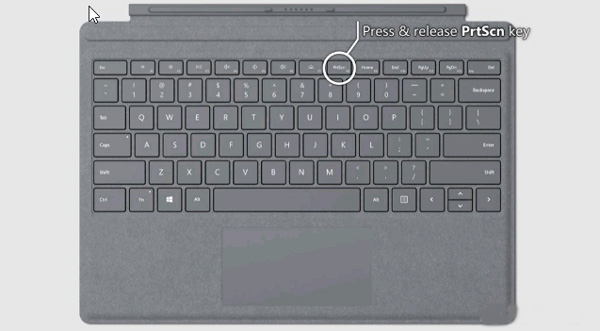
Method 3: How to Screenshot on Surface Pro with A Keyboard
You can just take advantage of the keyboard within Surface Type Cover to screenshot on Surface Pro as a laptop. Then you can follow the traditional method to take a snapshot as below.
Step 1Press the PrtScn key, or Alt + PrtScn within the keyboard to take a screenshot on the Surface Pro directly.
Step 2After that, you can paste the screenshot to Paint for further editing, Word or social media apps accordingly.
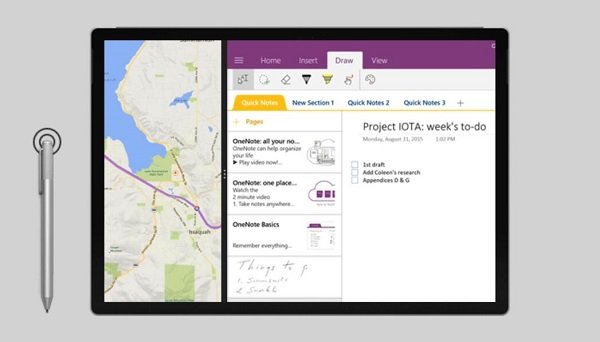
Method 4: How to Screenshot on Surface Pro via A Surface Pen
Another method to screenshot on Microsoft Surface Pro is the Surface Pen. It enables you to take a screenshot with the Screen Sketch new feature with the following process with ease.
Step 1Double-click the Eraser button on the top of your Surface Pen. You can also select a region and press the eraser button to screenshot a specific region on Surface Pro.
Step 2After that, you can edit, crop, and save the screenshot by click on the Save as button on the top right of the screen. Moreover, you can also share the screenshot to OneNote directly.
Part 2: FAQs about How to Take A Screenshot on Surface Pro
1. What are the Differences for Screenshot on Surface Pro and PC?
When you need to screenshot on a Surface Pro, what is the difference from the same process on a PC? If you do not use a mouse or keyboard with Surface Pro, you should choose a snipping tool that supports touch bar or the default ones of your Microsoft Surface Pro.
2. How to Screenshot on Surface Pro 3 or Earlier?
Press and hold the Windows logo button on the tablet and the Volume Down button at the same time. When the screen flashes and your screenshot will be captured. It is saved in the Screenshots subfolder in Pictures on your tablet automatically.
3. Is There A Default Snipping Tool to Screenshot on Surface Pro?
Besides the above methods, you can also locate the same snipping tools as Windows PC to screenshot on Surface Pro, such as the Windows Snipping Tool and Snip & Sketch Tool. (Find snipping tool for Mac here)
Conclusion
If you need to take a screenshot on a Surface Pro, you can learn more details about the 5 best methods from the article. In order to add an annotation, edit the screenshot, or manage the screenshot, Apeaksoft Screen Recorder is the desired solution you can take into consideration.