To explain something clearly, you can take a screenshot on your iPad and share it with others. A picture is a very straightforward way to convey and understand something. Do you know how to screenshot on iPad? This article will show you how to take a screenshot and edit it on your iPad. If you have problems with screenshots on a MacBook, this article is still worth watching.

- Part 1: How to Shot Screen on iPad Directly
- Part 2: How to Edit the Screenshot
- Bonus: Take a Screenshot on Your Mac
- Part 3: FAQs about Screenshot on iPad
Part 1: How to Shot Screen on iPad Directly
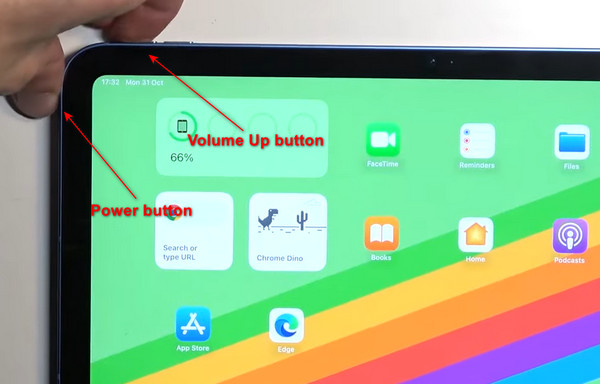
iPad provides the easiest way to take screenshots directly with only two buttons. You can take screenshots on your iPad by pressing both the Power button and the Volume Up button at the same time. Then, this screen will be captured at once.
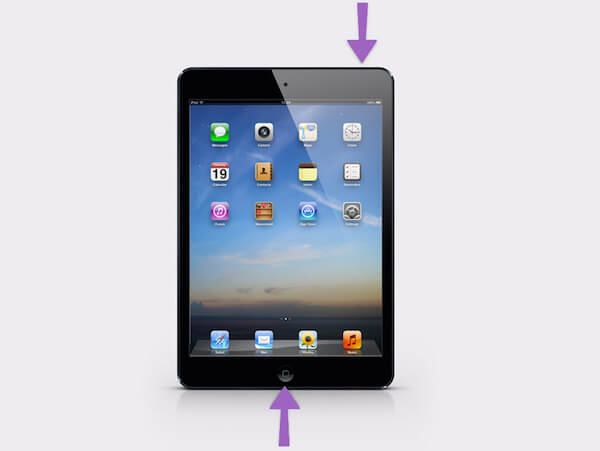
If your iPad has a Home button, you need to press the Home and Power buttons simultaneously to take a screenshot on the iPad.
Part 2: How to Edit the Screenshot
There are also 2 ways to post-process a screenshot on an iPad after you take it. It will make the screenshot clear of the content and neat in appearance.
Edit Screenshots on iPad with Thumbnails
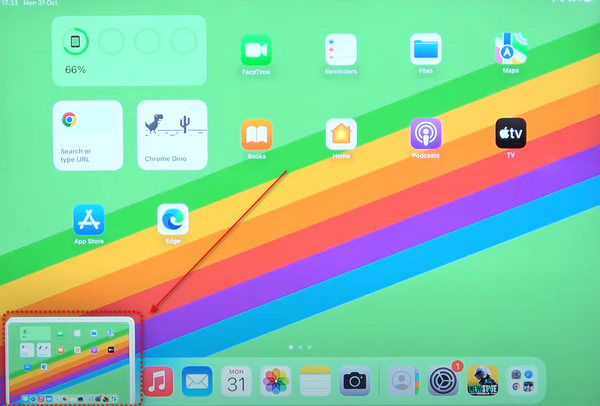
If you want to edit the screenshot you took on your iPad just now, you can tap on the small thumbnail to edit it on your iPad. Then, you can access a range of markup tools, including a pen, pencil, highlighter, and more. You can use these tools to add or reduce something to this screenshot on your iPad.
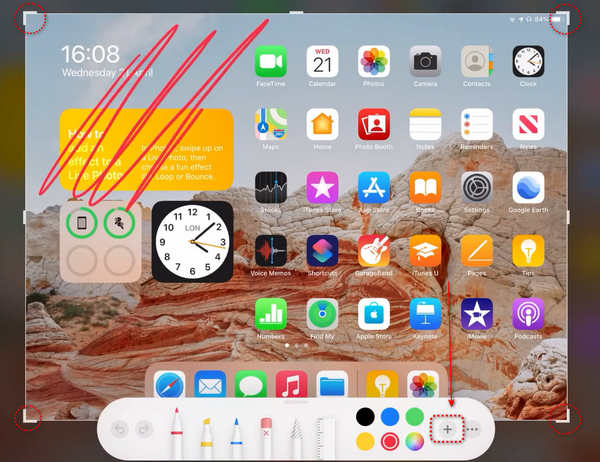
You can also drag the thick edges to adjust the size of your screenshot. Moreover, you can drop in a signature or a handy magnifying glass highlighting a particular section or add text according to your needs by tapping the Add button.
Undo Edits to Screenshots on iPad
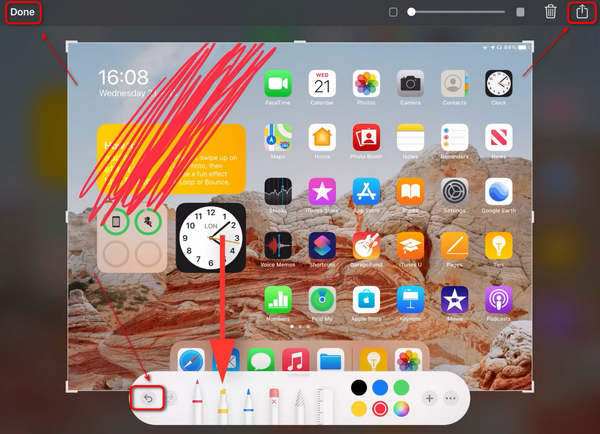
If you want to undo or recover your edits to the screenshots on your iPad, you can use the two curved arrows. To share this screenshot, tap the Share button to transfer it to your computer or Mail, Twitter, etc. When you have done everything, you can click the Done button to finish editing the screenshot on your iPad. Then it would help if you chose Save to Photos or Delete it.
Find Screenshots in Photos
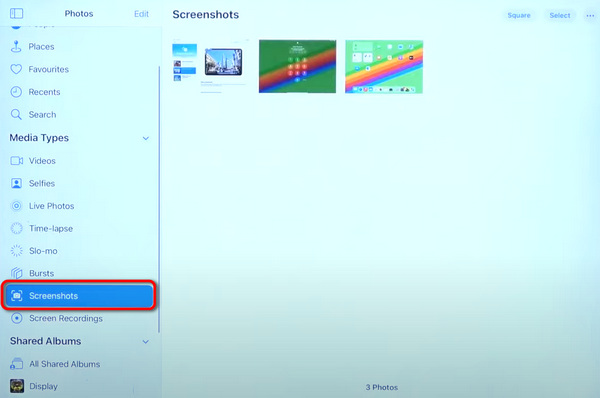
If your iPad is older than iPadOS 11, or you won't tap a thumbnail to edit it, you can go to Photos and find the photo after you take the screenshot on your iPad. Then, you can tap the Edit button in the right corner of your screen to edit your screenshot as you like. Here, you can clip your screenshot and adjust the color and light.
Bonus: Take a Screenshot on Your Mac
It seems not complicated to take a screenshot on an iPad, but how can you quickly take a screenshot on your Mac? Apeaksoft Screen Recorder could be the correct answer. This is a recorder program on your Mac that can take high-image-quality screenshots in different types you inevitably need in your work and life. Some extra editing features are also available with this program.

4,000,000+ Downloads
Easily take simple, scrolling window and popup menu screenshots.
Allow you to edit or add annotations to polish the screenshot.
Convert a screenshot to JPG, PNG, TIFF, and even GIF format.
Offer hotkeys and customize the hotkeys to start a screenshot.
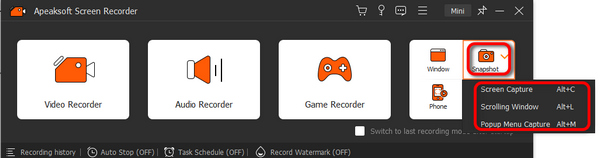
Step 1Download Apeaksoft Screen Recorder for free and launch it. Click the Screenshot button, and then you can click three options – Screen Capture, Scrolling Window, and Popup Menu Capture buttons.
Step 2Screen Capture lets you easily select an area on the screen to take a screenshot. Then, you can add some annotations or edit the photo with many editing features.
Step 3If you click the Scrolling Window button, you can choose an area on the screen and then scroll the mouse wheel to capture a long scrolling screenshot.

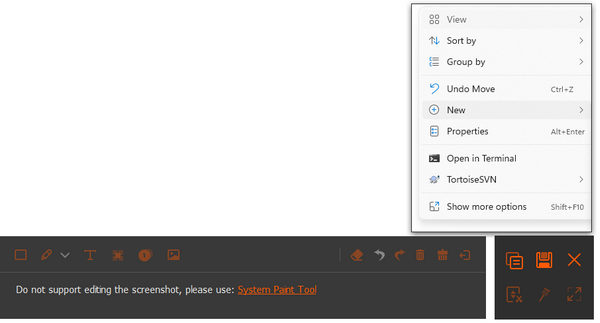
Step 4The Popup Menu Capture lets you take a screenshot of a menu while it won't make the menu disappear, such as the menu bar unlocked by a right-click on the desktop screen.
Part 3: FAQs about Screenshot on iPad
Why do I fail to take a screenshot on my iPad?
That's probably because of storage insufficiency. You can delete some photos or useless apps to free up more space. It would help if you also remembered not to swipe the thumbnail after you take a screenshot on an iPad, or the screenshot may disappear. Some duplicate photo cleaners can also quickly delete all duplicate photos on your iPhone.
How can I take a screenshot on an iPhone?
It would help if you pressed the Power button and the Volume Up button at the same time, and then your iPhone will start a screenshot. A thumbnail of the screenshot will come up on the bottom left side.
How can I quickly delete useless screenshots on my iPad?
You can go to the Photos app and tap the Albums button. Slide down to tap the Screenshots button in the Media Types section. Then, you can quickly select unwanted screenshots or clean them all.
Conclusion
You've learned how to take iPad screenshots. When you are having trouble capturing your MacBook screen, Apeaksoft Screen Recorder can easily take a screenshot for you. You can also fulfill many other features with this program. We are very glad if we can solve your problems.