Before installing this software, please make sure your computer meets the following system requirements:
Windows OS: Windows 11, Windows 10, Windows 8, Windows 7
CPU: 1GHz Intel/AMD CPU or above
RAM: 1G RAM or more
PowerPoint: You need to install Microsoft Office PowerPoint on your computer
Whether you want to convert PPT to video or DVD, you should keep the following points in mind.
Tips:
1. Microsoft Office PowerPoint must be installed on the computer where you use this software to convert PowerPoint to video or DVD.
2.Please do not open the PPT files with PowerPoint when you use this software to convert PPT to video or DVD.
Then follow the steps below to install Video Converter Ultimate on your computer:
Step 1. After downloading this software on your computer, double-click the .exe file.
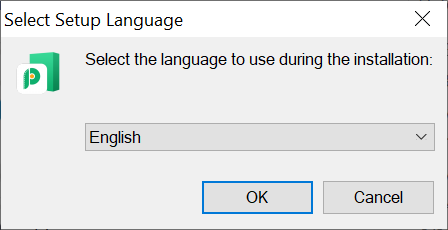
Step 2. In the pop-up window, click Yes to allow the software make changes to your device, then select the software language as per your need.
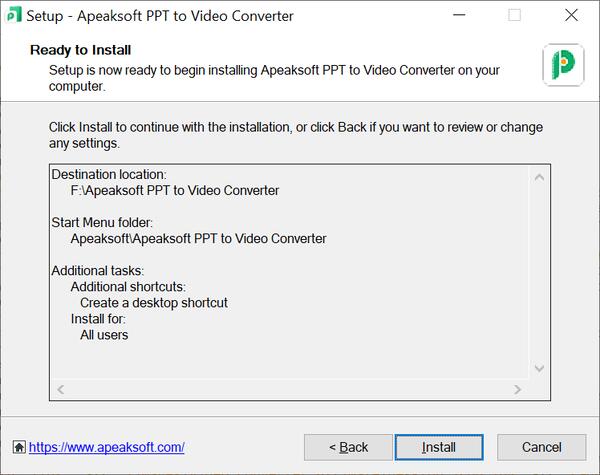
Step 3. Then follow the instructions step by step to accept the License Agreement and select the destination location to install the software, as well as whether to create a desktop shortcut and quick launch shortcut according to your need. Then click Install to start installing Apeaksoft PPT to Video Converter.
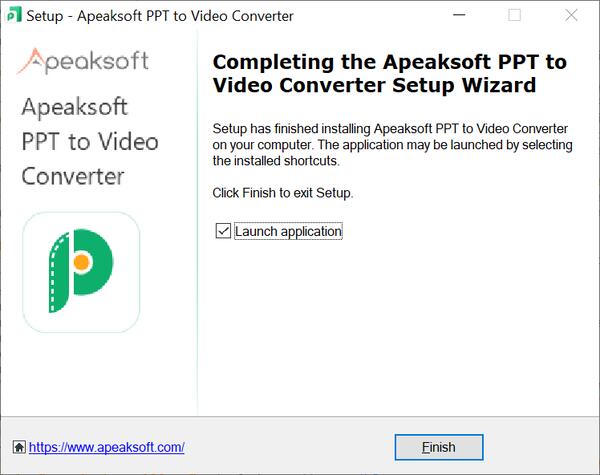
Step 4. After the installing process finishes, you can check Launch application or not and click Finish to exit the Setup.
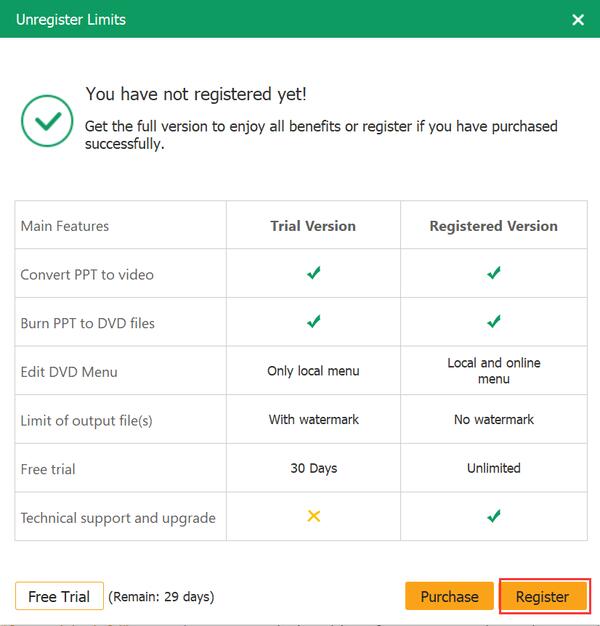
Step 1. To register this PPT converter, you can click Register on the right bottom corner in the pop-up window which will appear every time you open the software.
Step 2. After clicking the Register button, a window will pop up to let you input your email address which you use to receive the registration code and registration code. Then click Register to activate the software.
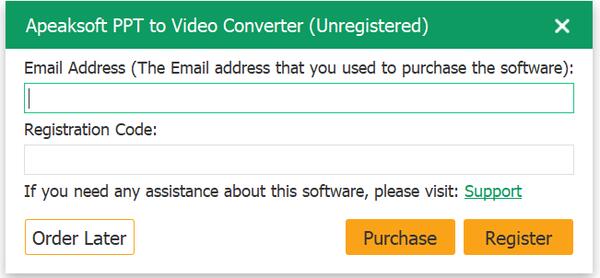
Alternatively, you can also click the key icon on the top right corner of the software main interface to enter the registration window. Input your order email and registration code. Then click Register to activate the software.
Note:
1. The free trial version of this PPT to Video Converter allows you to convert PPT to DVD or burn PPT to DVD for 30 days. If you want to unlock the limitation, please purchase the software to activate its full function.
2. After you purchase the software successfully, the registration code will be sent to your email address that you filled in the order form.
3. The Registration code is a string of characters marked as Activation key, license code or KEYCODE(S) in the order confirmation letter you received after the successful purchase.
We offer continuous technical support to Apeaksoft PPT to Video Converter to fix the technical issues reported by our users or add new features, so that we will update the software version from time to time. When a new version is available, you can update the software automatically or manually.
Run PPT to Video Converter, in the main interface, click Menu > Check Update… to check if there is a new version available.
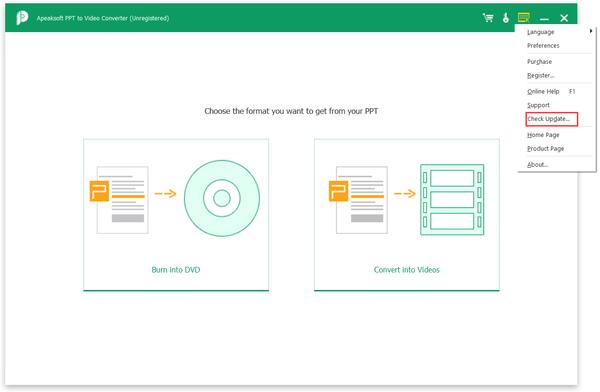
If you don’t want to miss any update, you can set in Menu > Preferences to let the software check for updates automatically.

Our Support Center provides you with professional solutions in case you encounter any problems when using our product.
Contact us via email: support@apeaksoft.com if you have any questions or problem with our software.
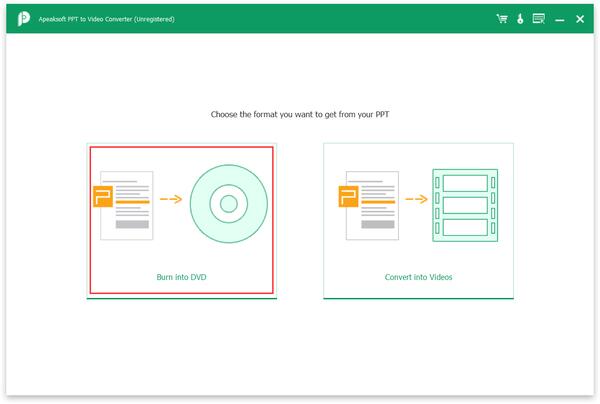
Apeaksoft PPT to Video Converter can help you out from the dilemma that Microsoft Office fails to work when you need to do a presentation. Just convert PowerPoint files to videos, you can display your PPT files on any portable players with no limitation.
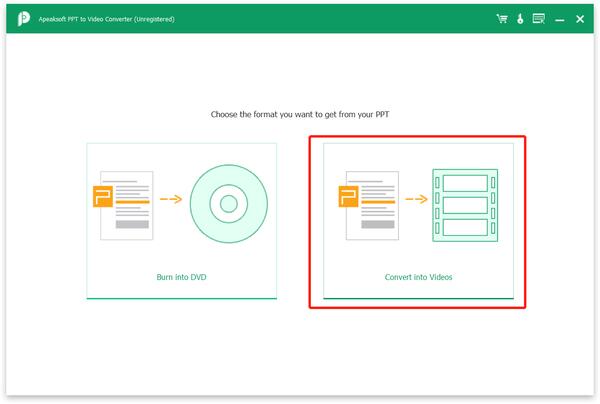
Step 1. Add PowerPoint file(s)
Run this software on your computer. Click Convert into Videos to enter PPT to Video interface, then click Add PPT File(s) button to add one or more PPT files you need to convert.
Alternatively, you are able to drag multiple video and audio files to this program.

Step 2. Make video settings
Before converting PPT to video, you need to make video settings according to your need.
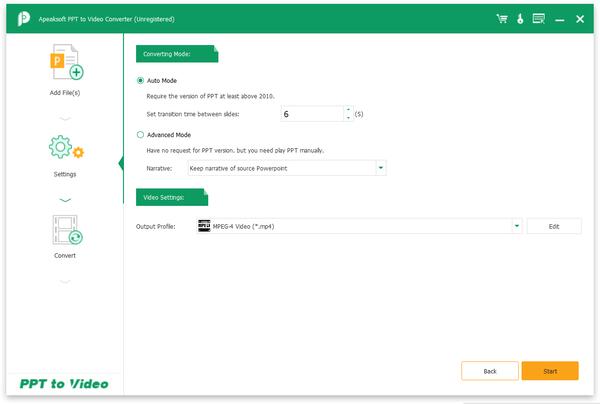
After you load PPT file(s) successfully, you will see that there are two converting modes for you to choose from.
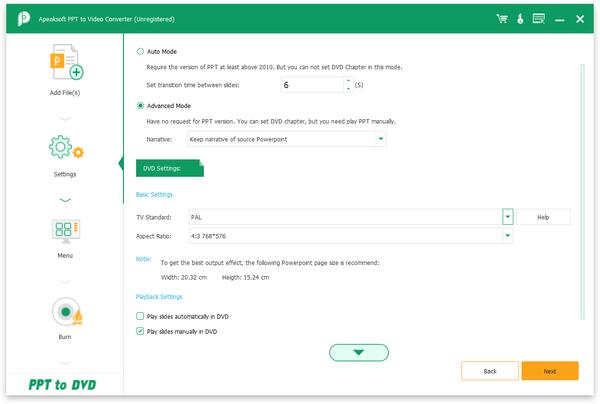
Auto Mode:
Auto Mode will make settings for you automatically, you just need to set the transition time between slides according to your need. But please make sure your PPT version is at least above 2010.
Advanced Mode:
Advanced Mode enables you to keep/ignore/record narrative for your PowerPoint files. And it has no requirement on your PowerPoint version, but you need to play PPT files manually.
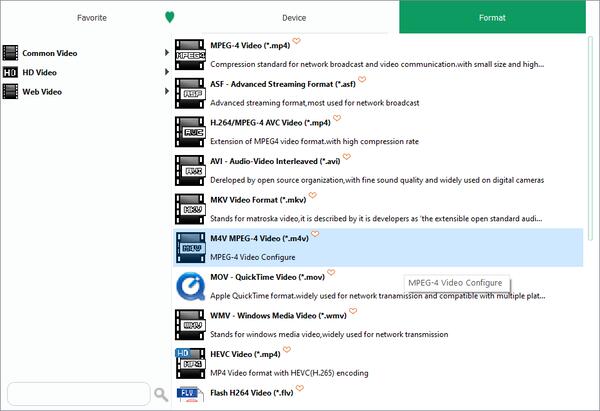
Video Settings:
In the Video Settings option, you can set the output format for your video. Almost all the popular video formats are supported, including MP4, AVI, WMV, MOV, M4V, etc. HD videos and Web video formats are also supported. You can also choose the output format by Device according to the device you want to display the PowerPoint files on.
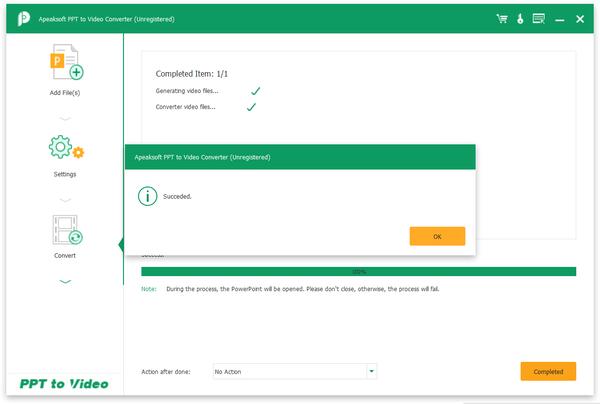
Step 3. Convert PowerPoint to video
After making all settings as you like, you can click the Start button to convert your PowerPoint files to video formats. After the conversion is finished, you can open the folder to check it.
If you want to keep some important PowerPoint files for long-time preservation, or make DVD tutorial from PowerPoint images, Apeaksoft PPT to Video Converter can help you burn PPT files to DVD disc or ISO files easily.
Step 1. Import PPT file(s) and insert DVD disc
Click Burn into DVD to enter PPT to DVD interface, then click Add PPT File(s) button to import one or more PPT files. Plus, if you need to burn PowerPoint files to a DVD disc, don’t forget to insert a blank DVD disc.

Step 2. Make DVD settings
Before you burn PPT to DVD, you can also make settings for the DVD in order to get the DVD you desire.
Two Converting modes:
Similar to PPT to Video function, there are also Auto Mode and Advanced Mode available for you to choose from.
DVD Settings:
DVD Settings lets you choose TV Standard and Aspect Ratio.
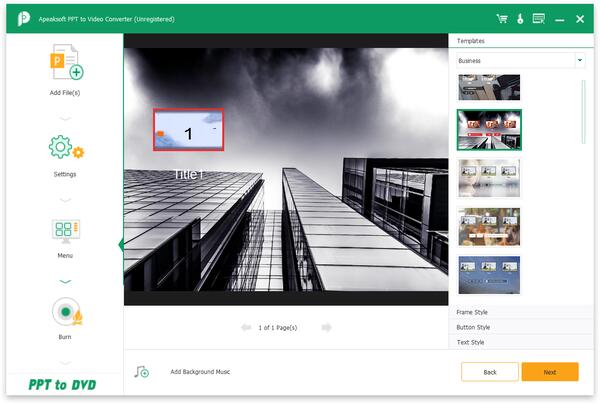
Set DVD menu:
After making DVD Settings, click Next to customize your DVD menu. Here you are given multiple built-in templates, Frame/Button/Text styles, you can choose as per your need. You are also allowed to add background music to the DVD.
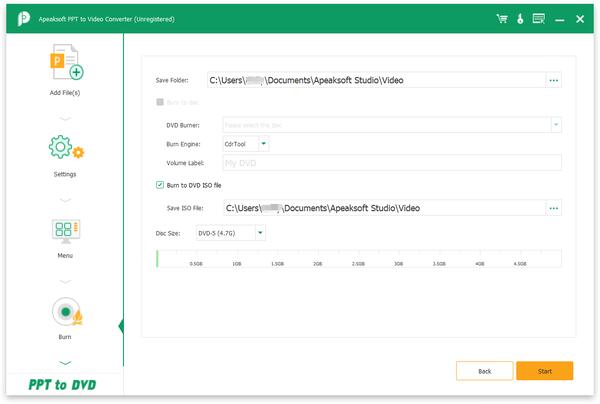
Step 3. Select burn to disc or ISO file
After you make all settings for DVD, click Next to next step. Here you need to choose to burn PPT to DVD disc or ISO File. If you choose to burn PPT to DVD disc, you need to select the Burn Engine, Volume Label you prefer; if you choose to burn PPT to ISO File, you need to set the destination to save the ISO File.
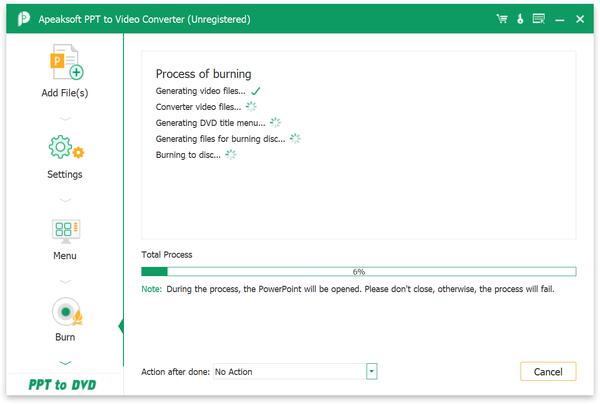
Step 4. Burn PPT to DVD
Finally, click Start to burn PowerPoint files to DVD.

Follow Us
Copyright © 2025 Apeaksoft Studio. All rights reserved.
 iPhone Data Recovery
 iOS System Recovery
 iOS Data Backup & Restore
 iOS Screen Recorder
 MobieTrans
 iPhone Transfer
 iPhone Eraser
 WhatsApp Transfer
 iOS Unlocker
 Free HEIC Converter
 iPhone Location Changer
 Android Data Recovery
 Broken Android Data Extraction
 Android Data Backup & Restore
 Android Unlocker
 Data Recovery
 Blu-ray Player
 Mac Cleaner
 DVD Creator
 PDF Converter Ultimate
 Windows Password Reset
 Phone Mirror
 Video Fixer
 Video Converter Ultimate
 Video Editor
 Screen Recorder
 PPT to Video Converter
 Slideshow Maker
 Free Video Converter
 Free Screen Recorder
 Free HEIC Converter
 Free Video Compressor
 Free PDF Compressor
 Free Audio Converter
 Free Audio Recorder
 Free Video Joiner
 Free Image Compressor
 Free Background Eraser
 Free Image Upscaler
 Free Watermark Remover
 iPhone Screen Lock
 Puzzle Game Cube