User Guide
- Introduction
- Install and Register
- Set Output and Backup Path
- Recover Android Data
- Android Data Extraction Guide
- Android Data Backup & Restore Guide
Try It Now!
Introduction
Apeaksoft Android Data Recovery is an Android data recovering software. You can recover deleted or lost data from Android phones and tablets with its help. You can not only find back contacts, messages, videos, photos and audio, but also recover WhatsApp data, documents and gallery.
Apart from the data recovery function, this Android toolkit can also help you back up the data in Android device to computer, fix broken Android system and extract data from broken Samsung devices. By the way, with the updated version, we add the individual information protection function to this software. Apeaksoft Android Data Recovery can help you recover any data you need on the basis of the personal information security.
Install and Register
Install
Step 1. You can download Apeaksoft Android Data Recovery by pressing the button below.
Step 2. Go to the upper-right corner to find your downloaded files. Click it and choose Yes.
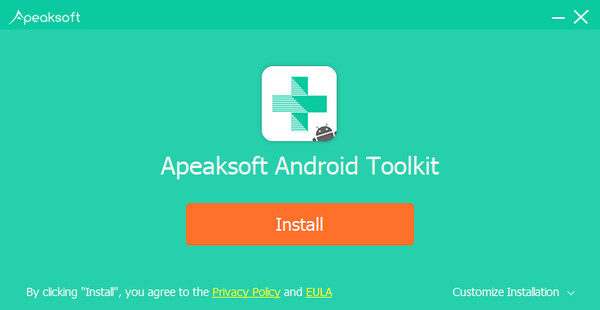
Step 3. Click Install in orange, and you will start the installation. It takes a few seconds.
Register
When you first launch this software, the register window will pop up for you. Input your e-mail address and the registration code you received.
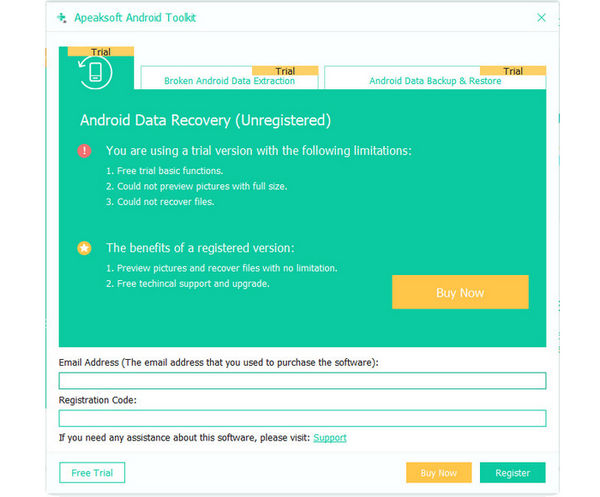
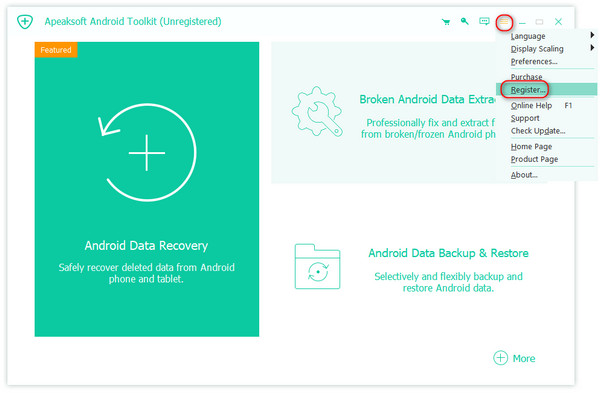
You can also click the key button on the top right corner of the interface to open the register window.
It is the same to click menu button to find Register option.
Note: After you purchased it successfully, the registration code will be sent to your email address that you filled in the order form.
Email Address: The email address you used to purchase this software.
Registration Code: A string of characters marked as Activation key, license code or KEYCODE(S) in the order confirmation letter you received after the successful purchase.
Set Output and Backup Path
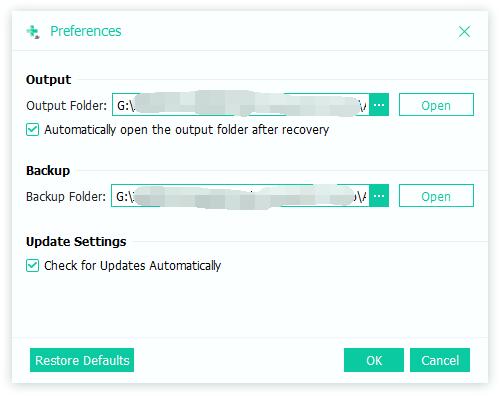
You need to set a location on your computer to save the recovered data.
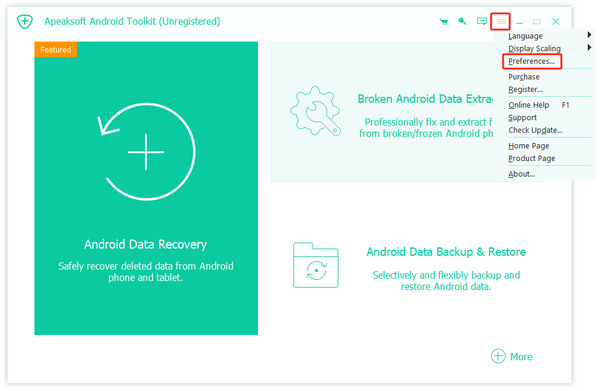
Click Preferences in the menu list.
You will see the preferences window. In this window, you can set the path the output path and the backup path.
Recover Android Data
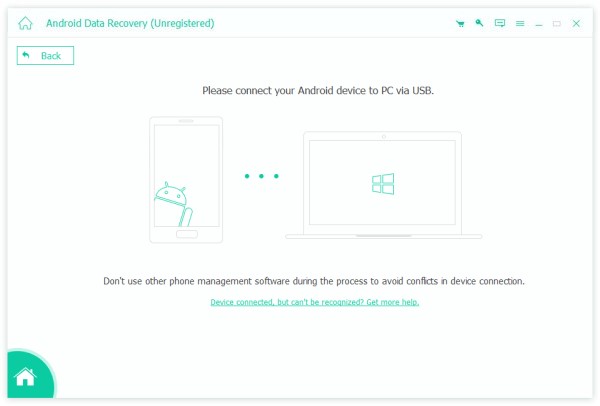
Step 1. Connect Devices
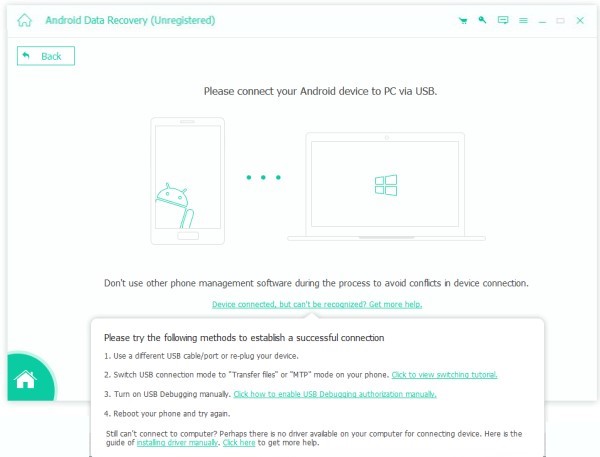
Double click the software button to launch it. After the start, choose Android Data Recovery part. Then you need to connect your Android devices to PC via USB.
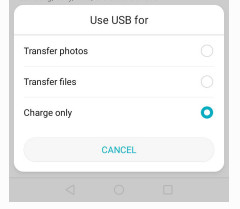
For some Android users, you need to get Developer Options and choose the mode of Transferring Files on the phone.
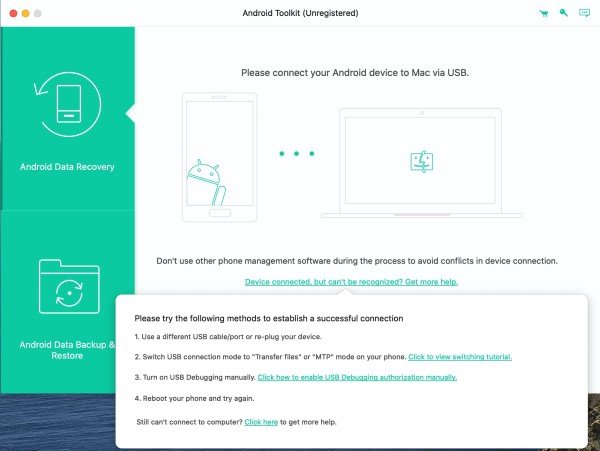
If your device is connected but not recognized successfully, click Device connected, but can’t be recognized? Get more help. to get more methods for establishing a successful connection.
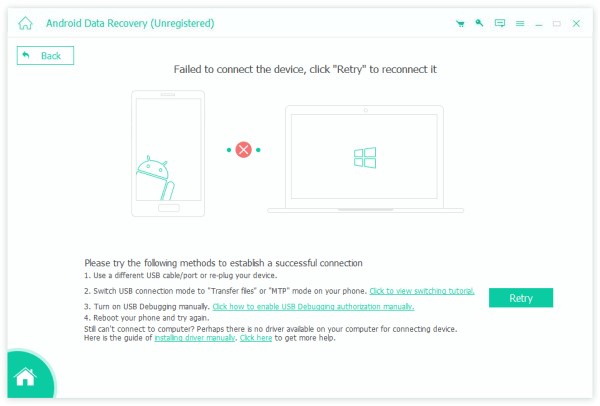
If you failed to connect the device to your computer, click on the Retry button to reconnect it.
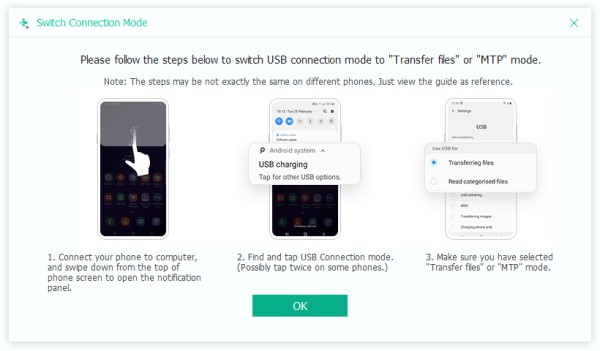
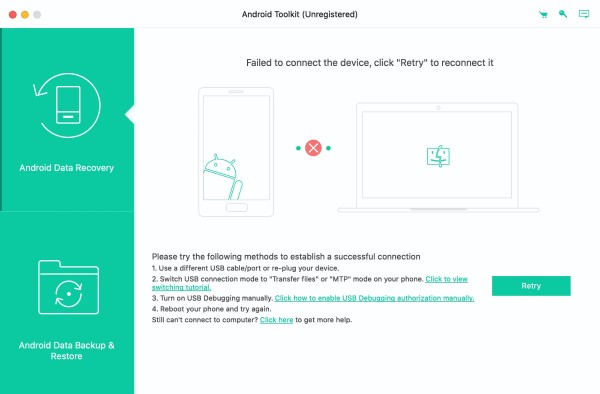
Or follow the second method by clicking Click to view switching tutorial to get detailed steps to switch USB connection mode to Transfer files or MTP mode.
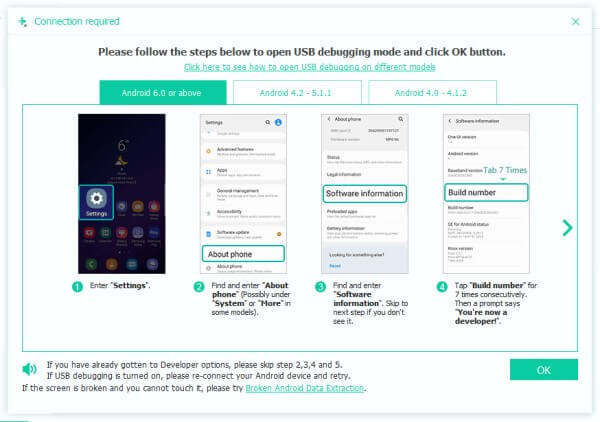
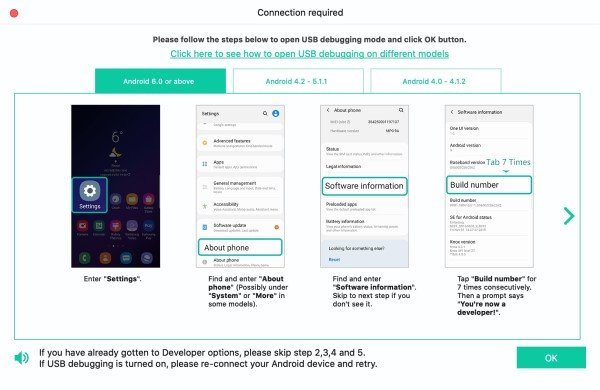
Android Data Recovery will prompt you to enable USB debugging on your phone if you don’t open the debugging mode. It will detect your Android version and teach you how to open the USB debugging mode on your phone. After finishing the operations on your phone, click the OK button to go to the next step.
Step 2. Select and Scan Data
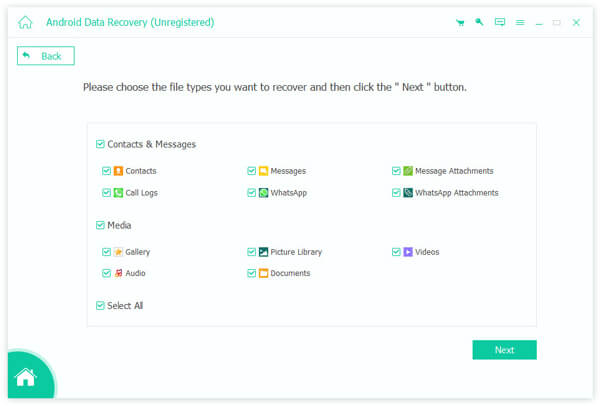
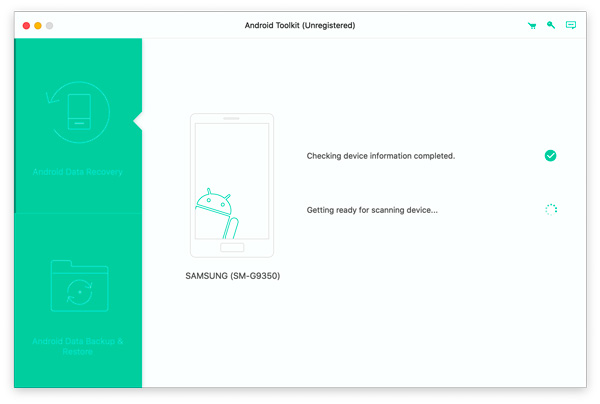
After connecting successfully, Apeaksoft Android Data Recovery will show a list listing all the data types. Choose the data type you want to recover and click Next.
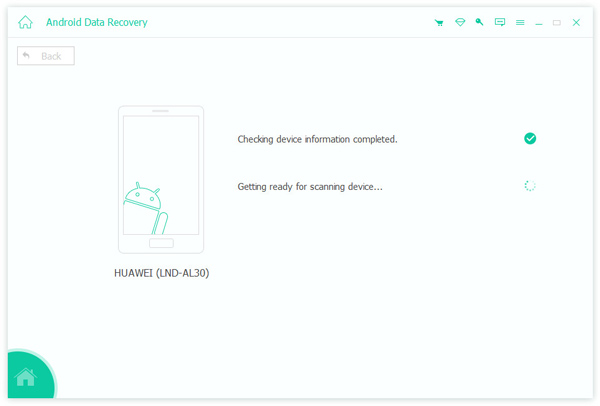
It will check your Android device information and scan your data on your Android device.
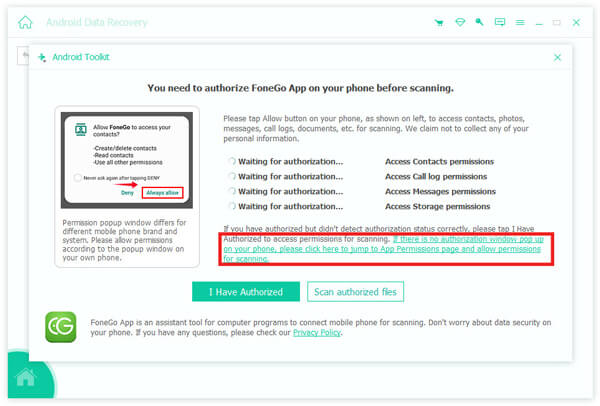
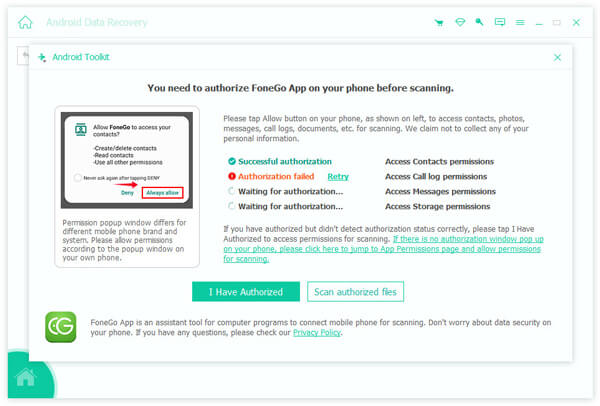
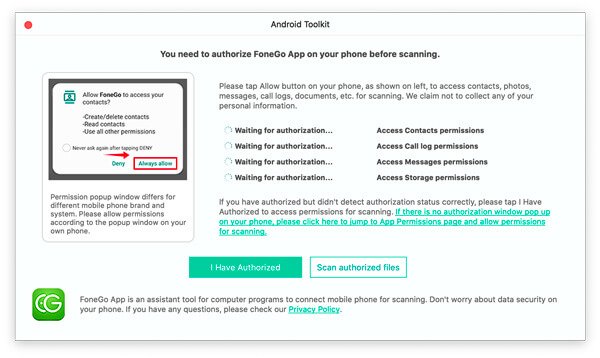
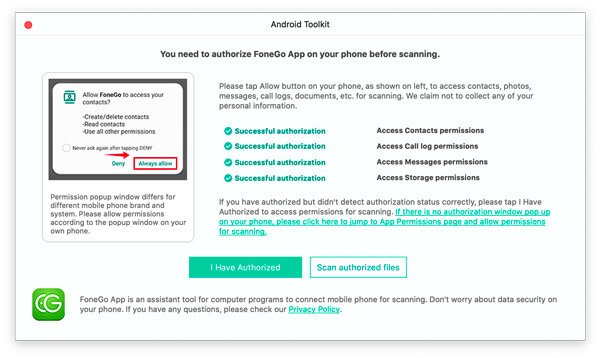
Then it will pop up a window for you to authorize FoneGo App. (FoneGo is just a 100% safe app, which allows the program to access the data on your phone.)
Before start scanning data, it will pop up a window on your devices for asking you whether allow it to access your information. There are four parts on it, contacts, call log, messages and storage. If you are sure, you need click Allow on your device for every part you need to scan.

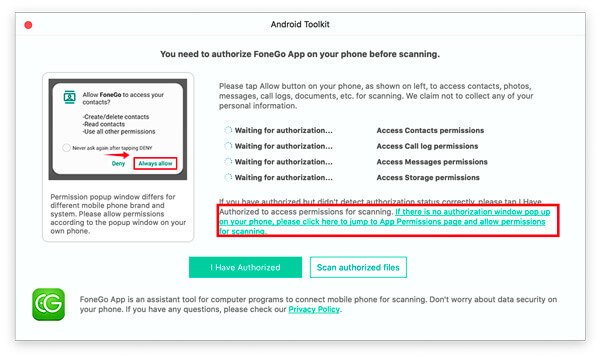
If there is no authorization window pop up on your phone, you can click the link above the buttons. Then your phone interface will jump to App Permissions page, and you can authorize FoneGo App on your phone by hand for those parts.
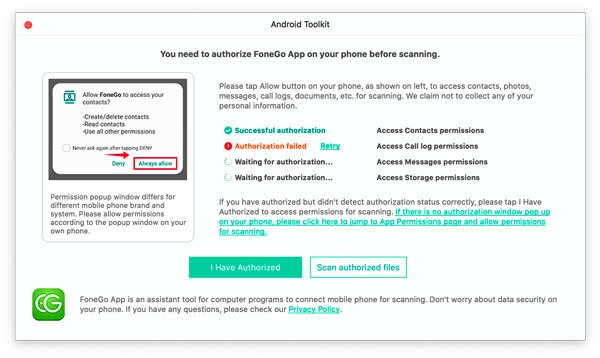
If it shows you Authorization failed, click Retry in blue to authorize again.
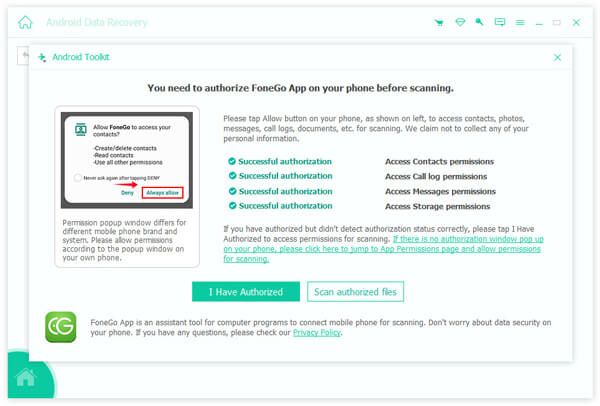
After it shows Successful Authorization for the parts you want to scan, click Scan authorized files.
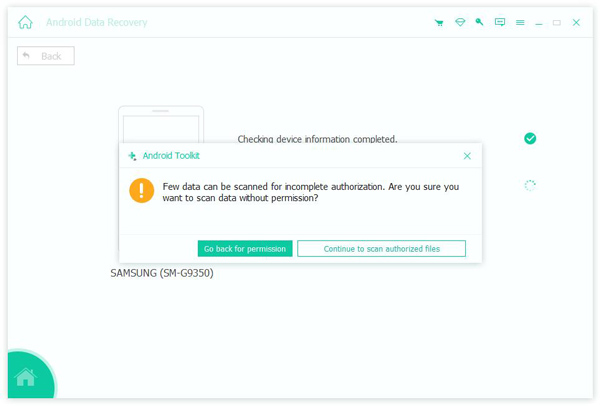
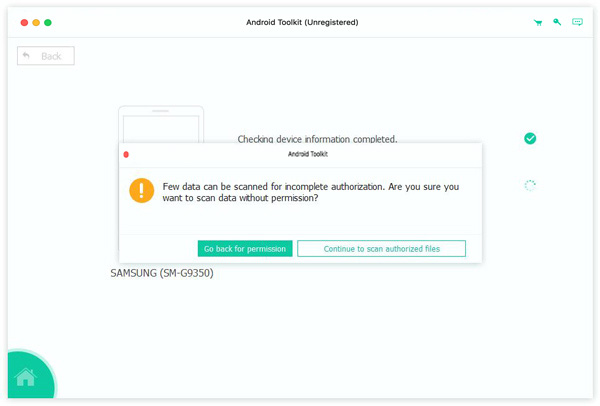
Then it will pop up a window for you to make sure the data to scan. If they are right, click Continue to scan authorized files to start scanning the data of the authorized parts for you. If not, you can click Go back for permission to go back to the authorization window.
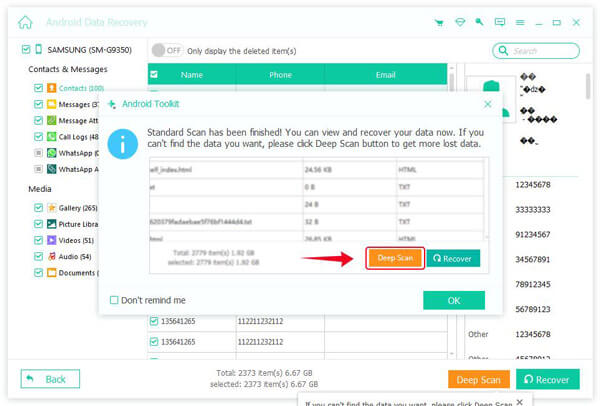
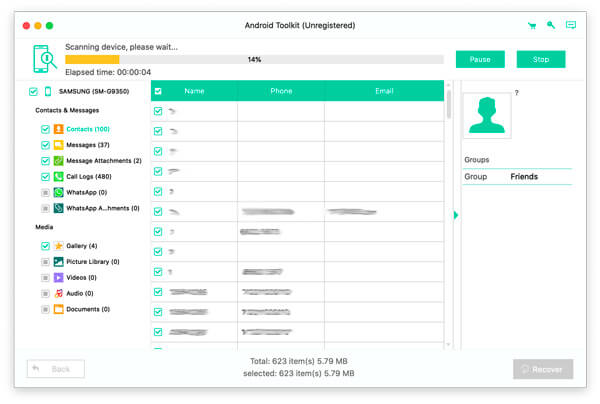
After scanning, it will show you the scanned data on your device in the left bar. Whatever you have or don’t have, there are all types of data it can recover in this bar.
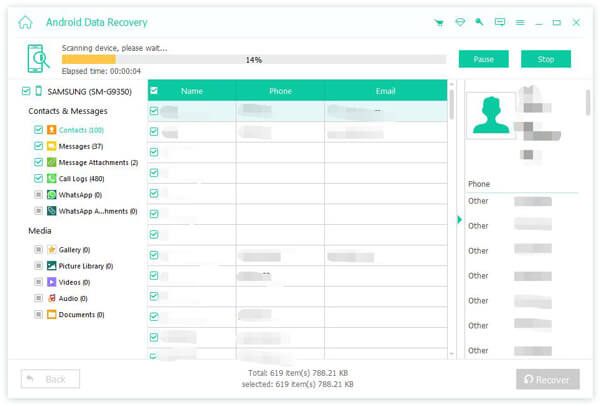
Because the first scanning is the Standard Scan, there would be not all deleted or lost data on your device. So if you can’t find the data you want, you can click Deep Scan on the bottom right corner to deep scan the data again.
Step 3. Recover Data
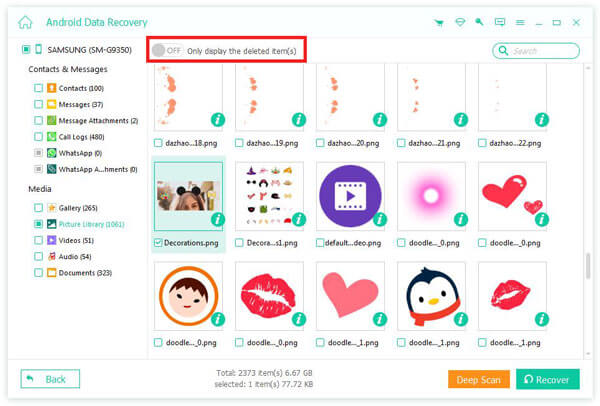
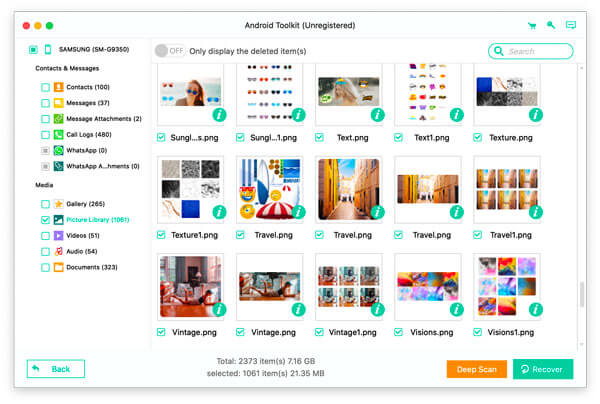
Select the data type on the left bar. If you want to recover all data of one type, you can tap the type on the left bar. If you only want to recover some files, just click the file on the right table.
Or you can also click Only display the deleted items to recover deleted files.
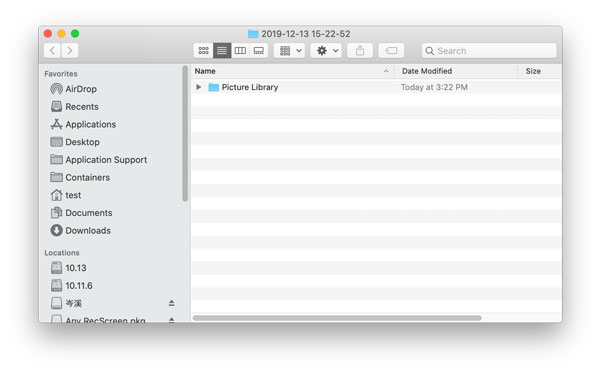
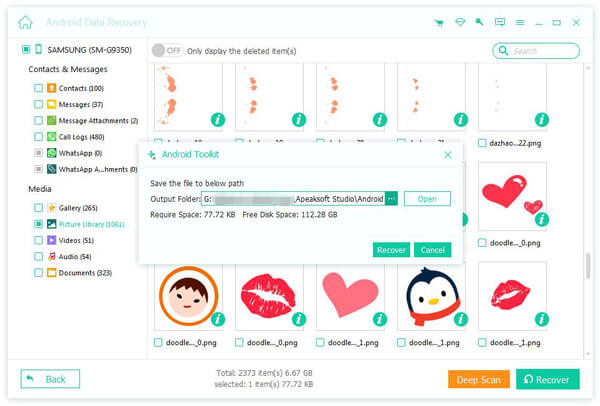
After you have decided the data you want to recover, click Recover button on the right down corner to start. Then it will pop up a window as the next picture. It will save the target data on your PC. The only thing you need to do in the last is setting the save path for your data to save them as backup.
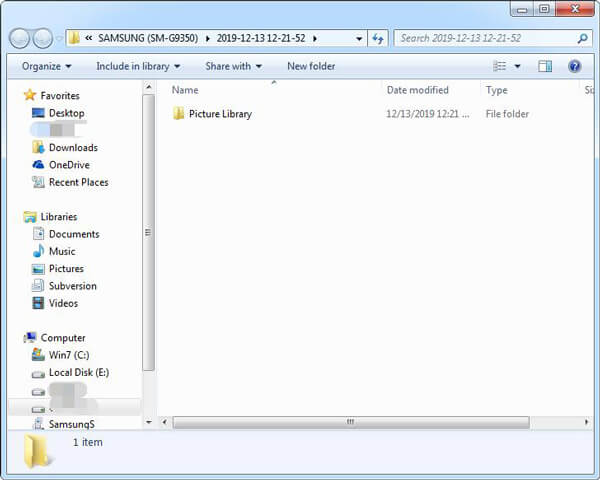
In a few seconds, it will be done. And it will pop up the target folder you have set.
User Guide
- Introduction
- Install and Register
- Set Output and Backup Path
- Recover Android Data
- Details for Recovering Various Android Data
- Android Data Extraction Guide
- Android Data Backup & Restore Guide
Try It Now!
Introduction
Apeaksoft Android Data Recovery for Mac is an Android data recovering software. You can recover deleted or lost data from Android phones and tablets with its help. You can not only find back contacts, messages, videos, photos and audio, but also recover WhatsApp data, documents and gallery.
Apart from recovering function, Apeaksoft Android Data Recovery for Mac can also help you backup your lost files including music video photos, WhatsApp, and documents and refresh the system and manage your phone and data. By the way, with the updated version, we add the individual information protection function to this software. Apeaksoft Android Data Recovery for Mac can help you recover any data you need on the basis of the personal information security.

Install and Register
Install
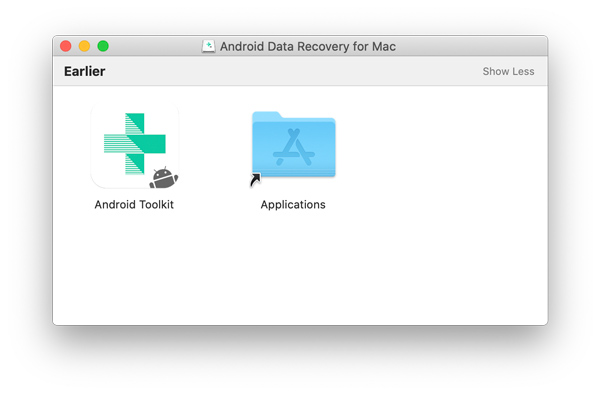
Step 1. To install Apeaksoft Android Data Recovery for Mac, you need to download it on your Mac. Here is the download link:
Step 2. Open the downloaded file. Then it will install Apeaksoft Android Data Recovery for Mac.
Register
When you first launch this software, the register window will pop up for you. Input your e-mail address and the registration code you received.
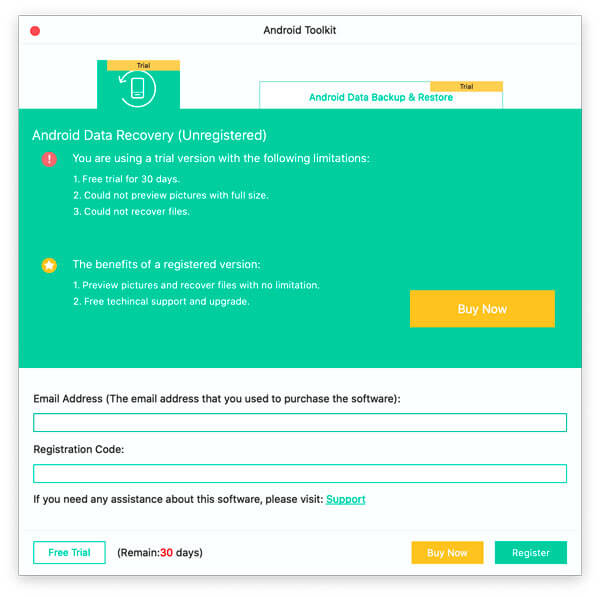
You can also click the key button on the top right corner of the interface to open the register window.
It is the same to click Help list to find Register option.
Note: After you purchased it successfully, the registration code will be sent to your email address that you filled in the order form.
Email Address: The email address that you fill in the order form.
Registration Code: A string of characters marked as Activation key, license code or KEYCODE(S) in the order confirmation letter you received after the successful purchase.
Set Output and Backup Path
For recovering your data, we need a set path for our recovered files. So you need set the save path for your files.
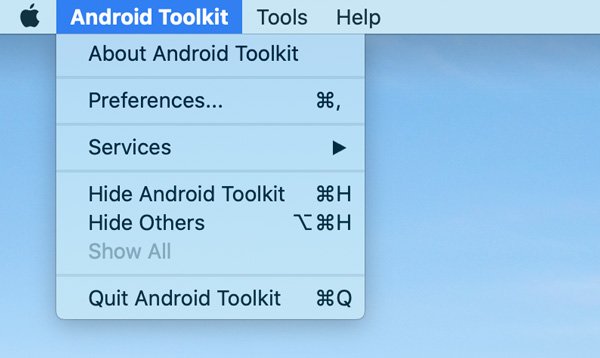
Click Preferences by clicking Android Toolkit on the top left corner of screen.
You will see the preferences window. In this window, you can set the path the output path and the backup path.

Recover Android Data
Step 1: Connect Devices
Double click the software button to launch it. After the start, choose Android Data Recovery part. Then you need to connect your Android devices to Mac via USB.
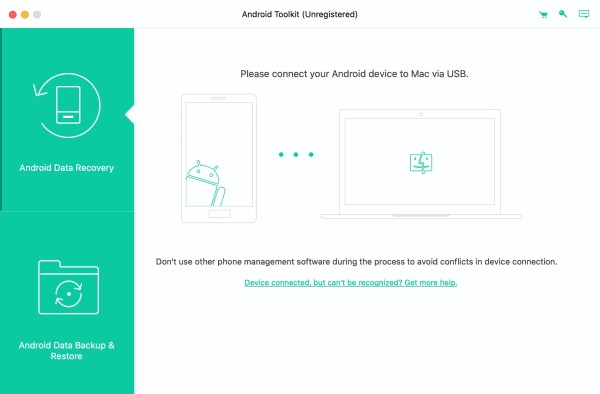
If your device is connected but not recognized successfully, click Device connected, but can’t be recognized? Get more help. to get more methods for establishing a successful connection.
If you failed to connect the device to your computer, click on the Retry button to reconnect it.
Android Data Recovery will prompt you to enable USB debugging on your phone if you don’t open the debugging mode. It will detect your Android version and teach you how to open the USB debugging mode on your phone. After finishing the operations on your phone, click the OK button to go to the next step.
Step 2: Select and Scan Data
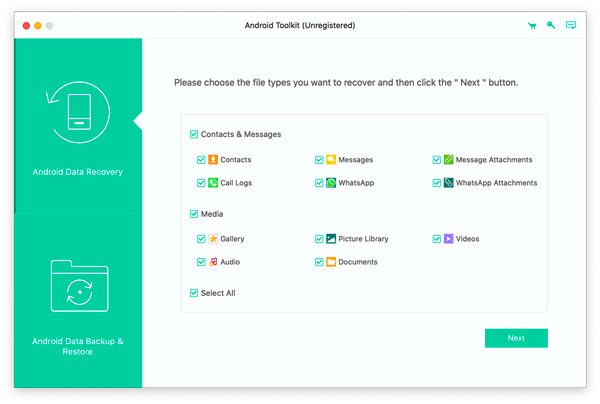
After connecting successfully, Apeaksoft Android Data Recovery will show a list listing all the data types. Choose the data type you want to recover and click Next.
It will check your Android device information and scan your data on your Android device.
Then it will pop up a window for you to authorize FoneGo App. (FoneGo is just a 100% safe app, which allows the program to access the data on your phone.)
Before start scanning data, it will pop up a window on your devices for asking you whether allow it to access your information. There are four parts on it, contacts, call log, messages and storage. If you are sure, you need click Allow on your device for every part you need to scan.
If there is no authorization window pop up on your phone, you can click the link above the buttons. Then your phone interface will jump to App Permissions page, and you can authorize FoneGo App on your phone manually for those parts.
If it shows you Authorization failed, click Retry in blue to authorize again.
After it shows Successful Authorization for the parts you want to scan, click Scan authorized files.
Then it will pop up a window for you to make sure the data to scan. If they are right, click Continue to scan authorized files to start scanning the data of the authorized parts for you. If not, you can click Go back for permission to go back to the authorization window.
After scanning, it will show you the scanned data on your device in the left bar. Whatever you have or don’t have, there are all types of data it can be recovered in this bar.
Because the first scanning is the Standard Scan, there would be not all deleted or lost data on your device. So if you can’t find the data you want, you can click Deep Scan on the bottom right corner to deep scan the data again.

Step 3. Recover Data
Select the data type on the left bar. If you want to recover all data of one type, you can tap the type on the left bar. If you only want to recover some files, just click the file on the right table.
Or you can also click Only display the deleted items to recover deleted files.
After you have decided the data you want to recover, click Recover button on the right down corner to start. In a few seconds, it will be done. And it will pop up the target folder you have set.